Link: https://youtu.be/7zd-HDzicdY
How to Add a Delete Button to a Classic Report When Using a Single Select List, a Button to Add to Table A, and a Classic Report Displaying Table A in Oracle APEX
In Oracle APEX, building interactive pages that allow users to add and delete records dynamically improves the user experience and data management efficiency. A common use case is having a single select list to choose an item, a button to insert the selected item into Table A, and a Classic Report that displays the contents of Table A. Adding a delete button inside the ID column of the Classic Report enables users to remove records easily, without leaving the page. This blog explains in detail how to implement this functionality step-by-step.
Detailed Steps to Implement
Create the Select List and Add Button
On your APEX page, create a Select List page item (e.g., P1_SELECT_ITEM) that populates options from a relevant source.
-
Add a button labeled "Add" (e.g., ADD_BTN) next to the select list.
-
Create a Dynamic Action on the Add button:
-
Action: Execute PL/SQL Code
-
PL/SQL Code example:
INSERT INTO TABLE_A (item_id) VALUES (:P1_SELECT_ITEM); -
Items to Submit: P1_SELECT_ITEM
-
Add a True Action to Refresh the Classic Report region that displays Table A.
-
-
Create the Classic Report Displaying Table A
-
Create a Classic Report region with SQL query similar to:
SELECT id, item_id, '<button class="delete-btn" data-id="' || id || '">Delete</button>' AS delete_button FROM TABLE_A -
Set the "Escape special characters" property of the delete_button column to No, so the HTML button renders correctly.
-
Assign a Static ID to the Classic Report Region
-
In the Classic Report region properties, set a Static ID (e.g., table_a_report) for easier referencing.
-
Add a Hidden Page Item for Delete Operation
-
Create a hidden page item (e.g., P1_DELETE_ID) to hold the ID of the record to delete.
-
Create a Dynamic Action to Handle Delete Button Clicks
-
Event: Click
-
Selection Type: jQuery Selector
-
jQuery Selector: .delete-btn
-
True Action 1: Execute JavaScript Code
var id = this.triggeringElement.getAttribute('data-id'); $s('P1_DELETE_ID', id); -
True Action 2: Execute PL/SQL Code
DELETE FROM TABLE_A WHERE id = :P1_DELETE_ID;Items to Submit: P1_DELETE_ID
-
True Action 3: Refresh the Classic Report region to reflect the changes.
Best Practices
Include a confirmation dialog before deletion to prevent accidental data loss, for example, using JavaScript confirm().
-
Implement authorization checks in the PL/SQL code to ensure only authorized users can delete records.
-
Consider soft deletes (marking records as inactive) instead of hard deletes to maintain audit trails.
-
Validate that the ID submitted for deletion exists and belongs to the current user or context.
-
Test thoroughly to handle exceptions like foreign key constraints or dependent data.
Oracle APEX Documentation
For more information on Dynamic Actions, Classic Reports, and page items, visit:
https://docs.oracle.com/en/database/oracle/apex/
Adding a delete button inside a Classic Report when using a select list and add button workflow enhances the interactivity and usability of your Oracle APEX application. By combining Dynamic Actions with PL/SQL processes and client-side scripting, you can provide users a seamless experience to manage data efficiently. Following best practices ensures the functionality is secure, reliable, and easy to maintain.
The following information comes from the app built in the video
VLOG Table SQL CODE
VLOG_COUNTRY DDL
CREATE TABLE "VLOG_COUNTRY"
( "ID" NUMBER GENERATED BY DEFAULT ON NULL AS IDENTITY MINVALUE 1 MAXVALUE 9999999999999999999999999999 INCREMENT BY 1 START WITH 1 CACHE 20 NOORDER NOCYCLE NOKEEP NOSCALE NOT NULL ENABLE,
"COUNTRY_NAME" VARCHAR2(200 CHAR),
CONSTRAINT "VLOG_COUNTRY_PK" PRIMARY KEY ("ID")
USING INDEX ENABLE
) ;
STEP 1 - The List

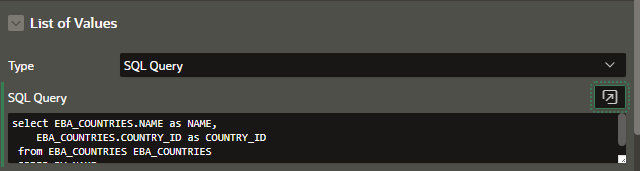
List of Values – SQL Query:
Select EBA_COUNTRIES.NAME as NAME,
EBA_COUNTRIES.COUNTRY_ID as COUNTRY_ID
from EBA_COUNTRIES EBA_COUNTRIES
ORDER BY NAME
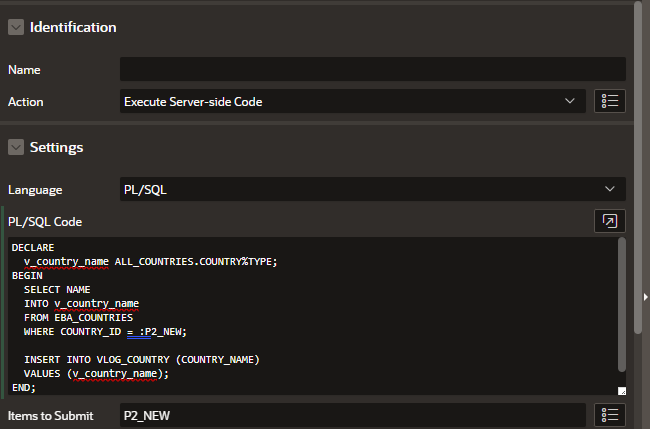
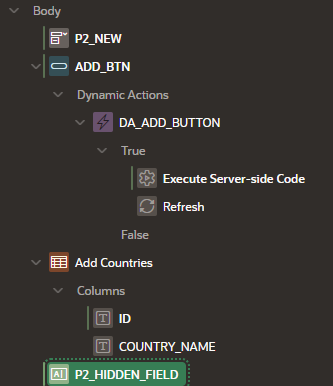
Step 2- The Button:

DA- EXECUTE SERVER SIDE CODE
v_country_name ALL_COUNTRIES.COUNTRY%TYPE;
This is a PL/SQL variable declaration, and it's using a special feature called %TYPE.
Explanation:
v_country_name → This is the name of the variable we're creating.
ALL_COUNTRIES.COUNTRY%TYPE → This means:
"Use the same data type as the COUNTRY column in the ALL_COUNTRIES table."
What It Does:
It automatically matches the variable's data type to the column, so you don't have to manually define the type (like VARCHAR2(100) or CHAR(50)).
This makes your code:
Safer (less risk of data type mismatch)
Easier to maintain (no need to update the variable type if the table changes)
DECLARE
v_country_name ALL_COUNTRIES.COUNTRY%TYPE;
BEGIN
SELECT NAME
INTO v_country_name
FROM EBA_COUNTRIES
WHERE COUNTRY_ID = :P2_NEW;
INSERT INTO VLOG_COUNTRY (COUNTRY_NAME)
VALUES (v_country_name);
END;
Make sure you add the list to the submit

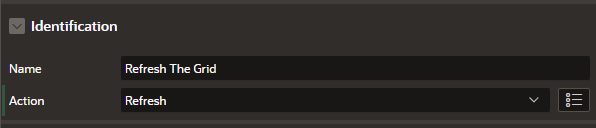
REFRESH

Select the region/report
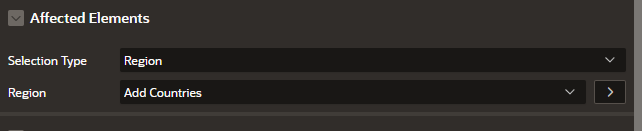
Step 3 - Modifying the REPORT

Make ID visible
From:

To:

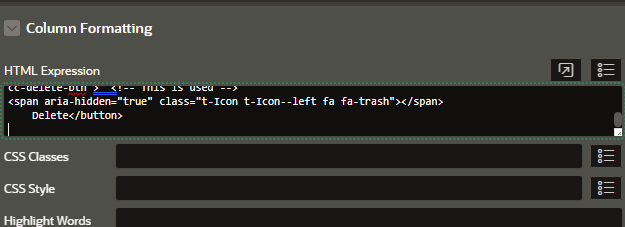
In the Column Formatting - HTML Expression add this:
<button type="button" data-task-id="#ID#" class="t-Button t-Button--icon t-Button--hot t-Button--danger t-Button--simple t-Button--iconLeft cc-delete-btn"> <span aria-hidden="true" class="t-Icon t-Icon--left fa fa-trash"></span> </button>
Add Countries
Step 4- ADD a HIDDEN TEXTFIELD
FROM:

TO:

Step 5 - ADD DELETE DA
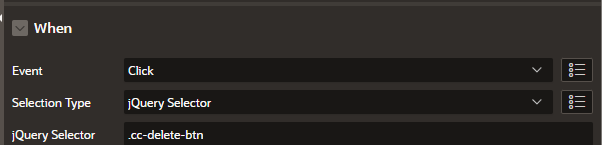
This is the button class that was added to the report under the ID column. Make sure that you have the period in front of the name.
.cc-delete-btn
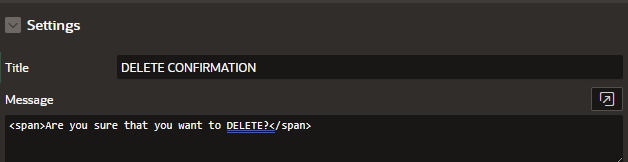
Step 7- TRUE ACTION 1 – CONFIRM

<span>Are you sure that you want to DELETE?</span>
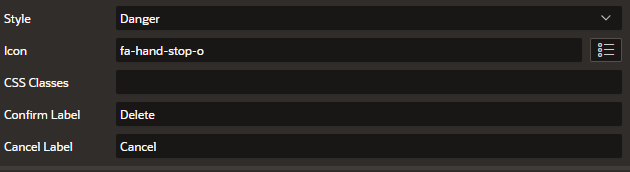
fa-hand-stop-o
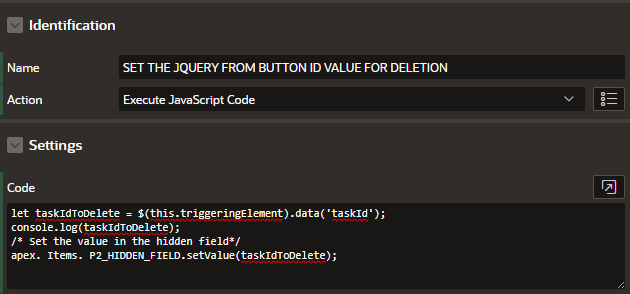
Step 8 - TRUE ACTION 2 - SET THE JQUERY FROM BUTTON ID VALUE FOR DELETION
Use this code in the JavaScript section
let taskIdToDelete = $(this.triggeringElement).data('taskId');
console.log(taskIdToDelete);
/* Set the value in the hidden field*/
apex. Items.P2_HIDDEN_FIELD.setValue(taskIdToDelete);
Step 9 - TRUE ACTION 3- DELETE ROW FROM TABLE

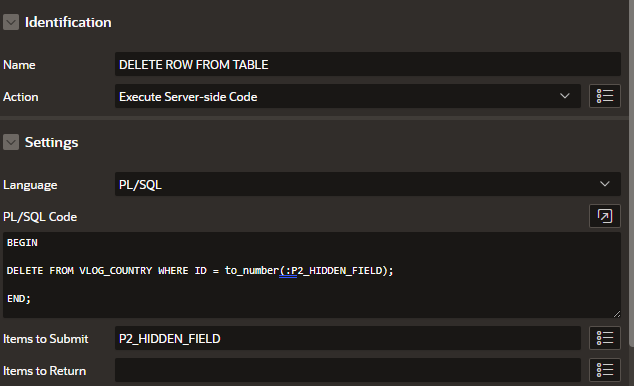
BEGIN
DELETE FROM VLOG_COUNTRY WHERE ID = to_number(:P2_HIDDEN_FIELD);
END;
Step 10 - TRUE ACTION 4- REFRESH FRID