Introduction
Oracle APEX (Application Express) offers a low-code environment for rapidly building scalable, secure web applications. Whether you're a seasoned developer or just starting out, reating an application in APEX is a structured and intuitive process. This guide walks you through the foundational steps—from selecting your application type and adding pages, to customizing regions and building interactivity with dynamic actions. By the end, you'll have a working application and a solid understanding of how APEX components come together to create a dynamic user experience.
Creating the Application
Step 1: Select the APP Type
To begin creating your application in Oracle APEX, start by selecting the type of app you want to build. From the APEX home screen, click on “Create” and choose “New Application.” You’ll be presented with various options such as “Desktop,” “Mobile,” or “Progressive Web App (PWA),” depending on your project needs. Most standard web applications begin with the “Desktop” option, which provides a flexible and responsive interface suited for most business use cases. Once selected, you’re ready to move on to defining your app’s structure.

Step 2: Select Create
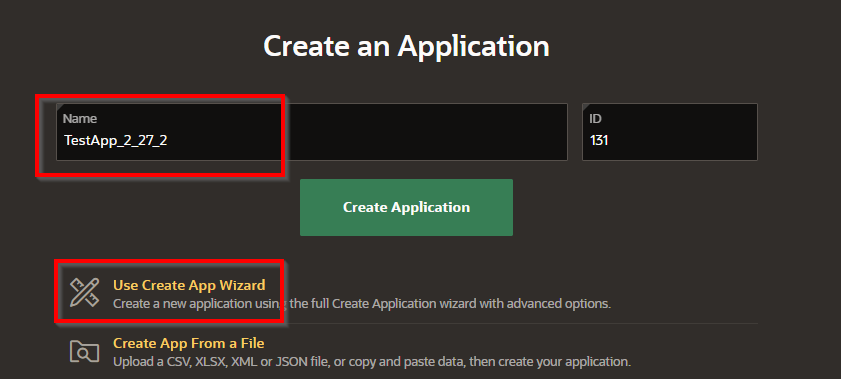
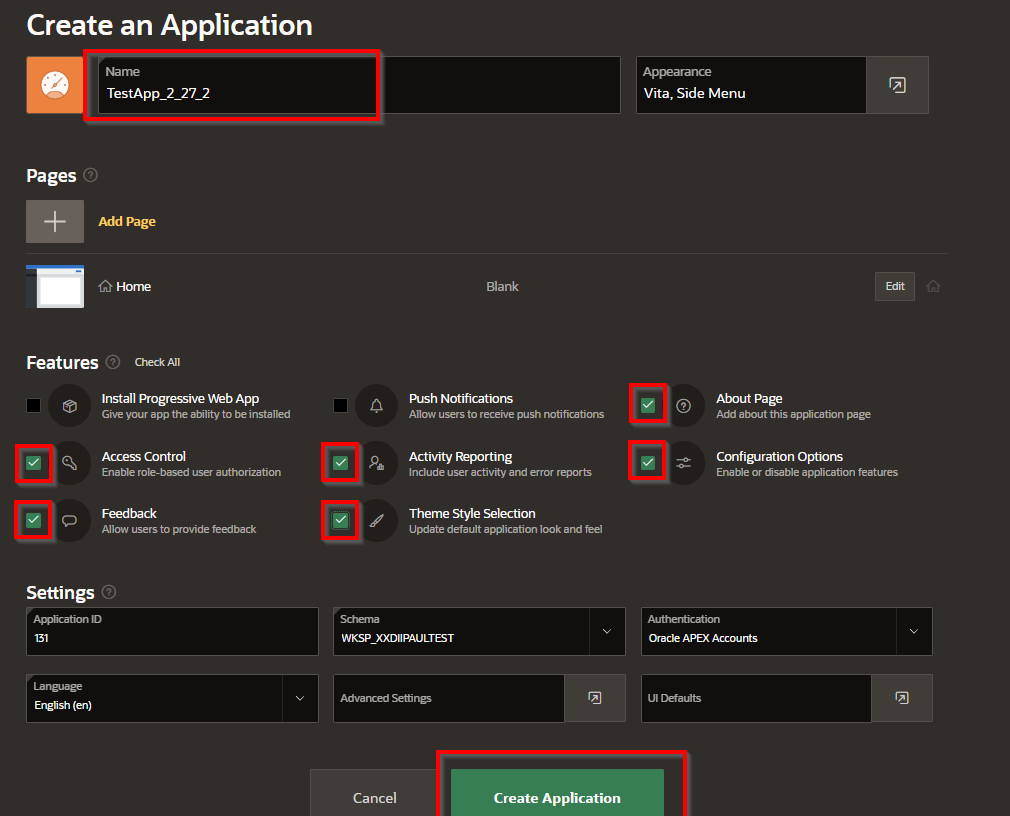
After choosing your app type, proceed by clicking the “Create” button. This action initiates the application creation wizard, where you’ll begin configuring key settings such as the application name, features to include (like authentication or activity reporting), and the overall layout. At this stage, you’re essentially laying the groundwork for your application’s structure, so take a moment to review the available options before continuing. Once everything looks good, click “Next” to continue building your app.

Step 3: Create Application
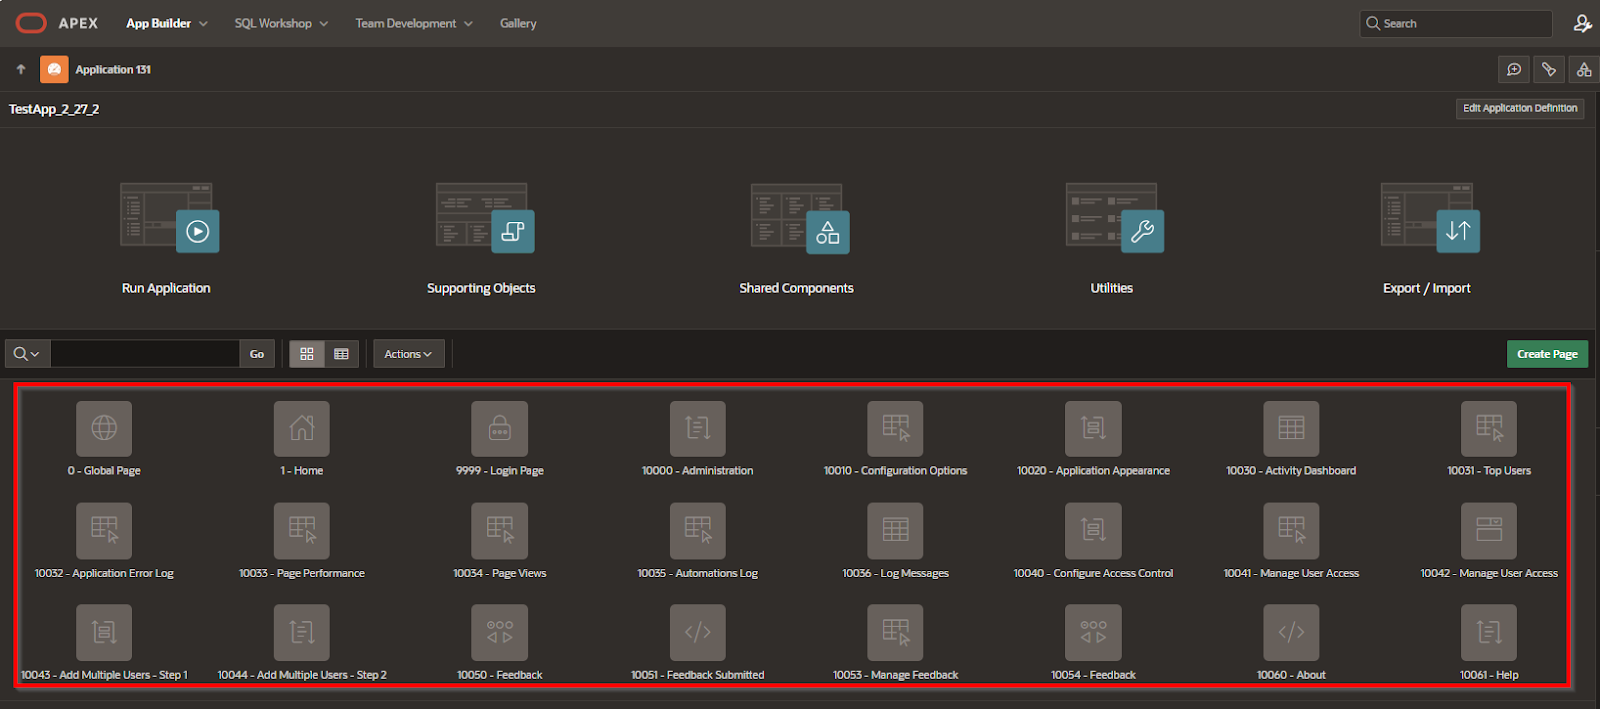
With your app type selected and initial settings configured, it's time to generate the application. Click the “Create Application” button to finalize your choices. APEX will now build the application framework based on your selected options—this includes generating default pages, navigation menus, and any features you've opted to include, such as user authentication or activity monitoring. Once the process completes, your new application will open in the App Builder interface, ready for further customization and development.
Making use of the Global page (Page 0)
As the name implies, the Global page is global to the application. Any field or action that is displayed on that page will be displayed, or be accessible, to every other page in the application.
This CAN be used as a sort of “Global Variable” holder, but global variables are best used via the “Application Items”
In Oracle APEX, Page 0—commonly known as the Global Page—serves as a powerful tool for creating elements that should appear across every page in your application. Think of it as a universal template: any components, such as buttons, items, or regions, added to Page 0 will automatically render on all other pages.
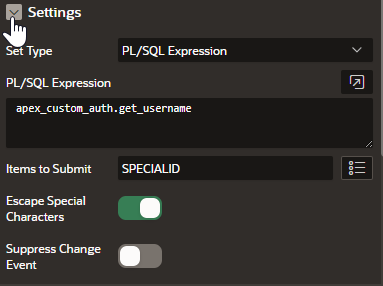
For example, if you add a hidden item like P0_SPECIALID to Page 0 and set its value using a Dynamic Action on page load (e.g., fetching the logged-in user's username via a PL/SQL expression), that value becomes available throughout the app. This makes Page 0 especially useful for storing global variables or UI elements that should remain consistent across your application—such as headers, messages, or navigation aids—without needing to duplicate them on every individual page.
Here is an example:
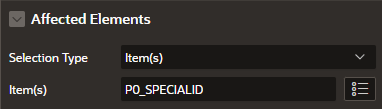
Page 0 has a field called P0_SPECIALID
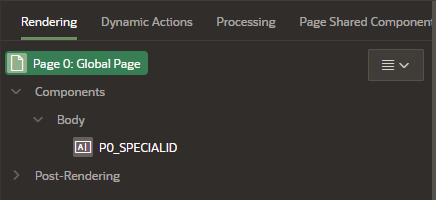
That field is filled by an “On Page Load” Dynamic Action
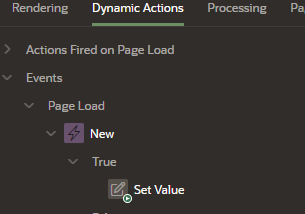
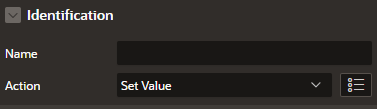
The Dynamic Action
The result is that every page will display that field with the selected value like this:

Another way to create an application in APEX is using the ORACLE APEX Quick SQL code. This is a way of developing a data model, which can then be used to develop the application itself.
Step 4: Adding a page to the application
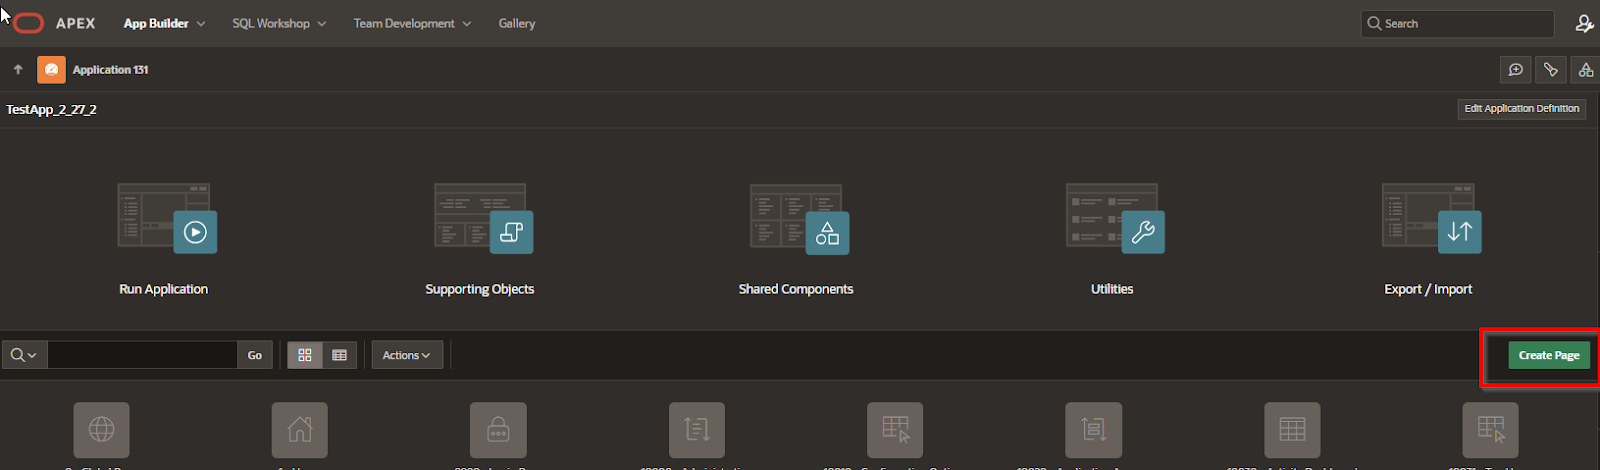
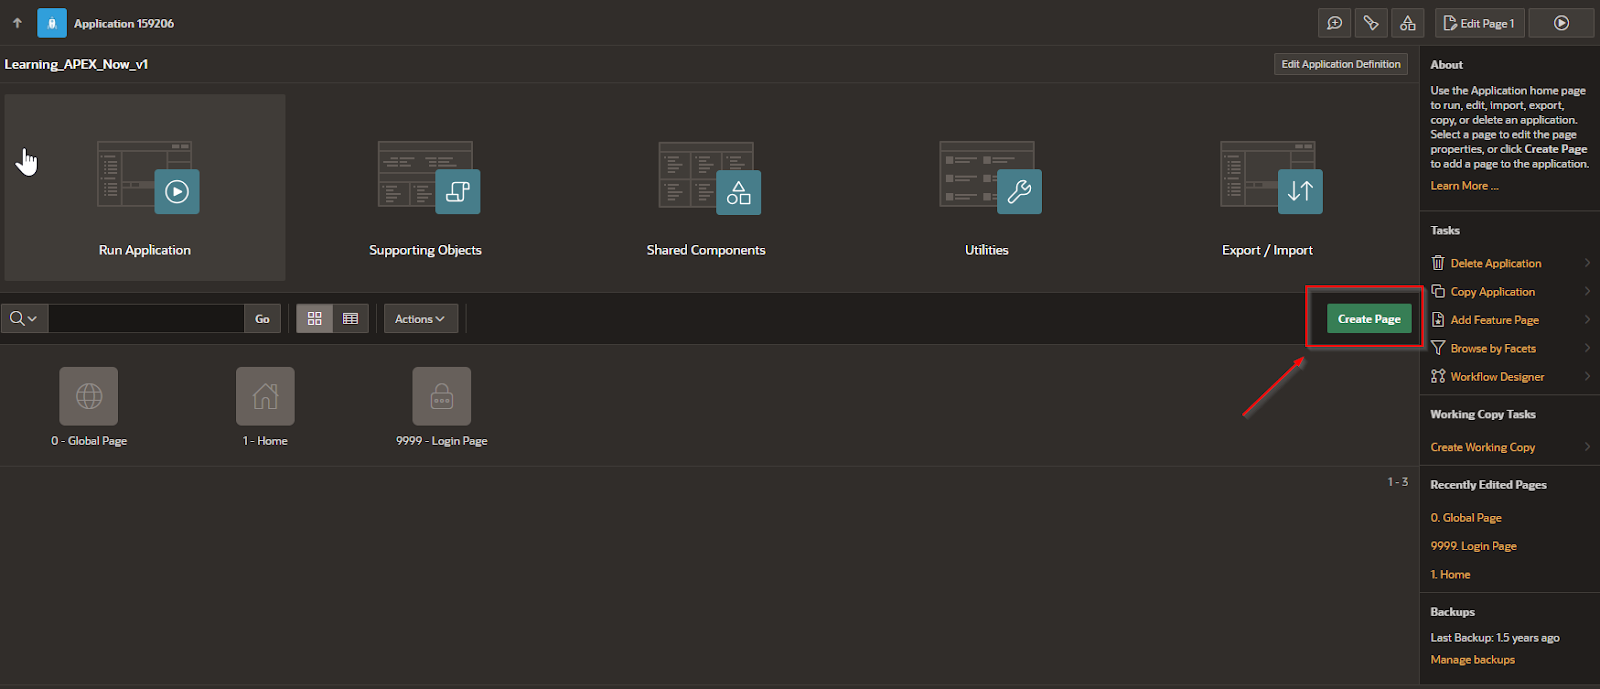
To expand your application’s functionality, you’ll need to add new pages. Begin by clicking the “Create Page” button within the App Builder. You’ll be prompted to choose the type of page you want to add—this could be a form, report, chart, dashboard, or a completely blank page, depending on your needs.
After selecting the desired page type, enter a page name, optionally define a page number, and then click “Create Page.” APEX will generate the new page and add it to your application's navigation and structure. This modular approach allows you to build out your application one page at a time, keeping everything organized and easy to manage.
Click on the ‘Create page” button.
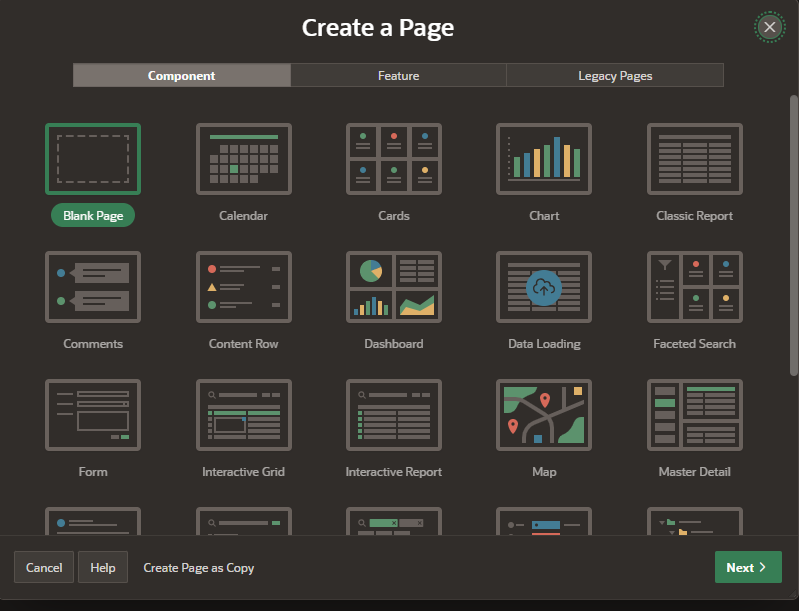
Select the type of page that you want to add
Add the name of the page, the page type, and press the “Create Page”

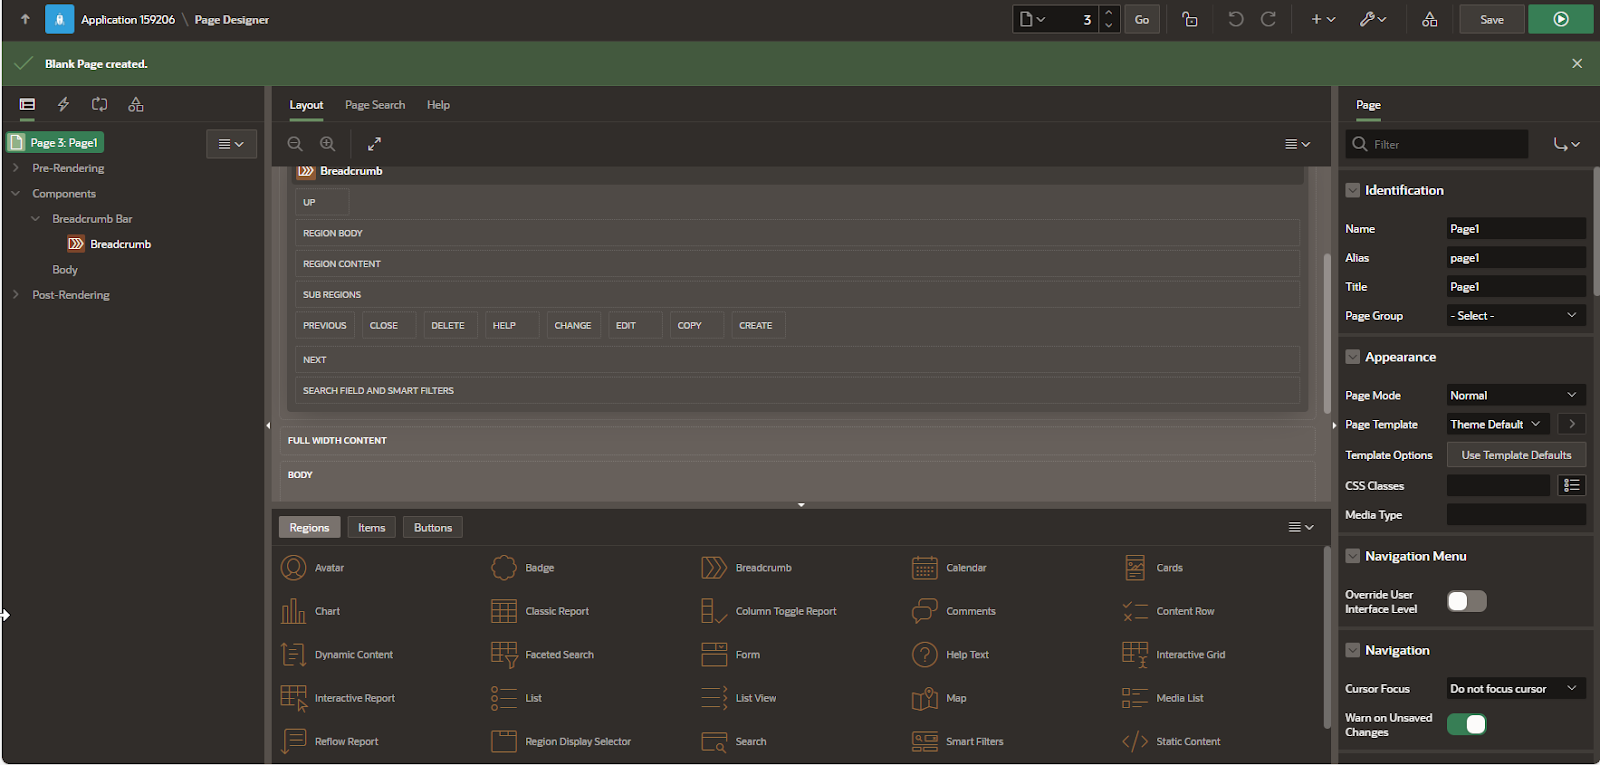
Finally you get something that loos like this
Step 5: Adding fields to the application
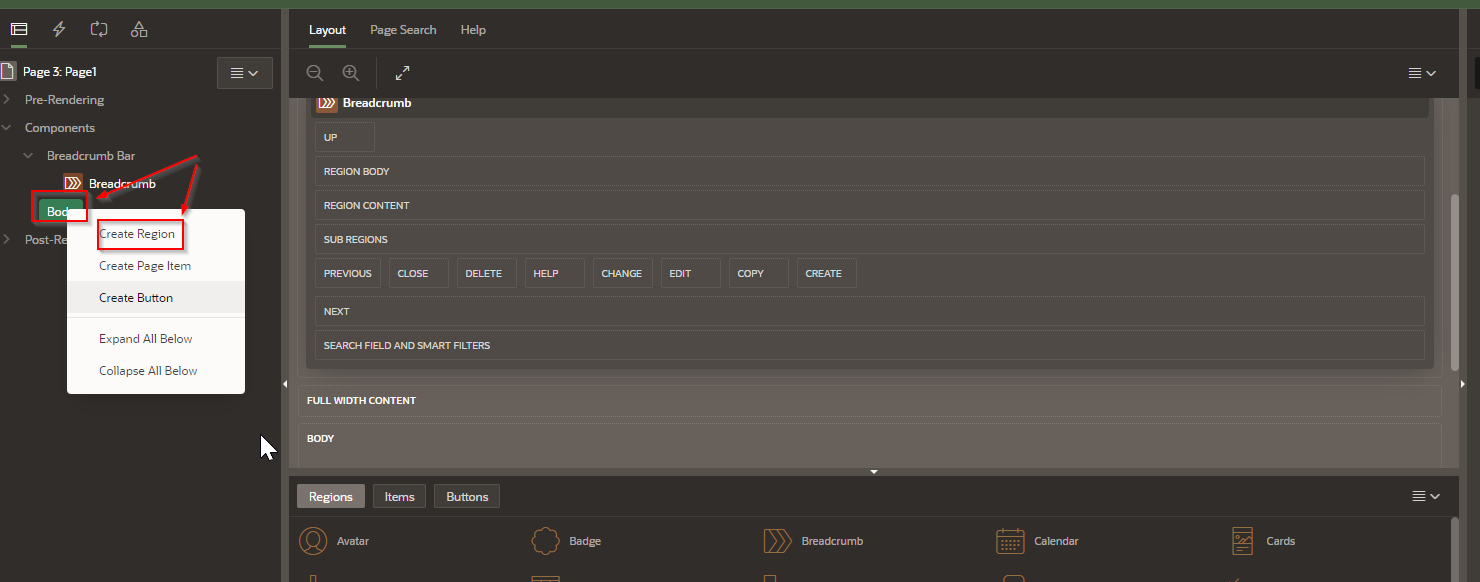
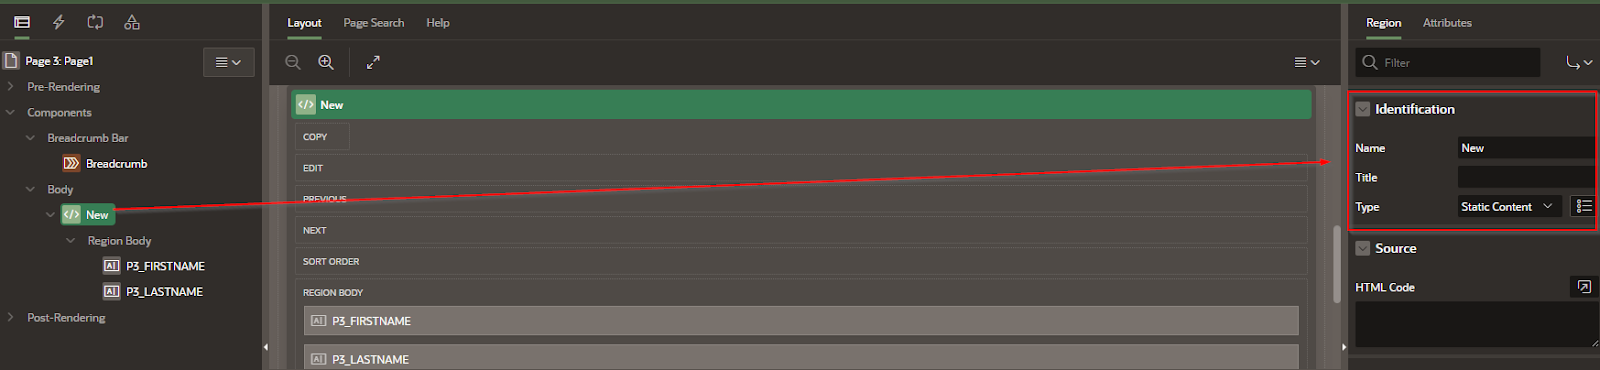
Once you’ve created a new page, you can begin adding fields to collect or display data. In the Page Designer, right-click on the “Body” section under the page layout tree and select “Create Region.” This creates a container where you can place your fields—think of it as similar to a <div> in HTML.
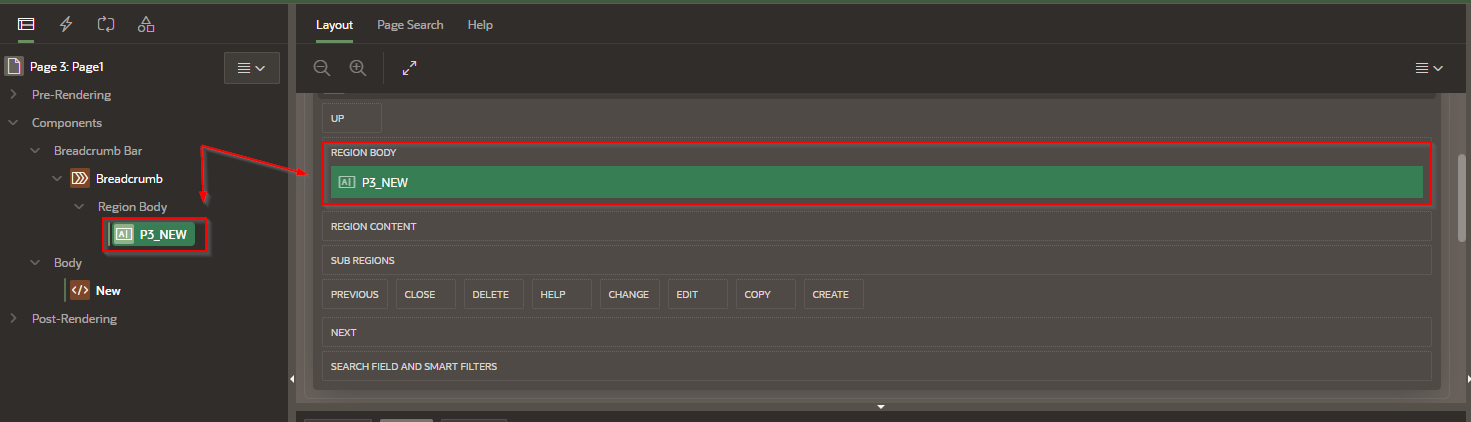
Next, from the Component Palette on the left, drag and drop a “Text Field” into the new region’s “Region Body.” The field will appear in both the visual layout on the right and the logical structure on the left. You can repeat this step to add additional fields as needed.
This visual, drag-and-drop approach makes it easy to design your page layout and quickly build forms, data inputs, or display elements that are fully integrated with your application’s logic.
In the Page
Right click on “Body”
Select “Create region”
Next:
Drag a “text Field”
…Into the “Region Body”
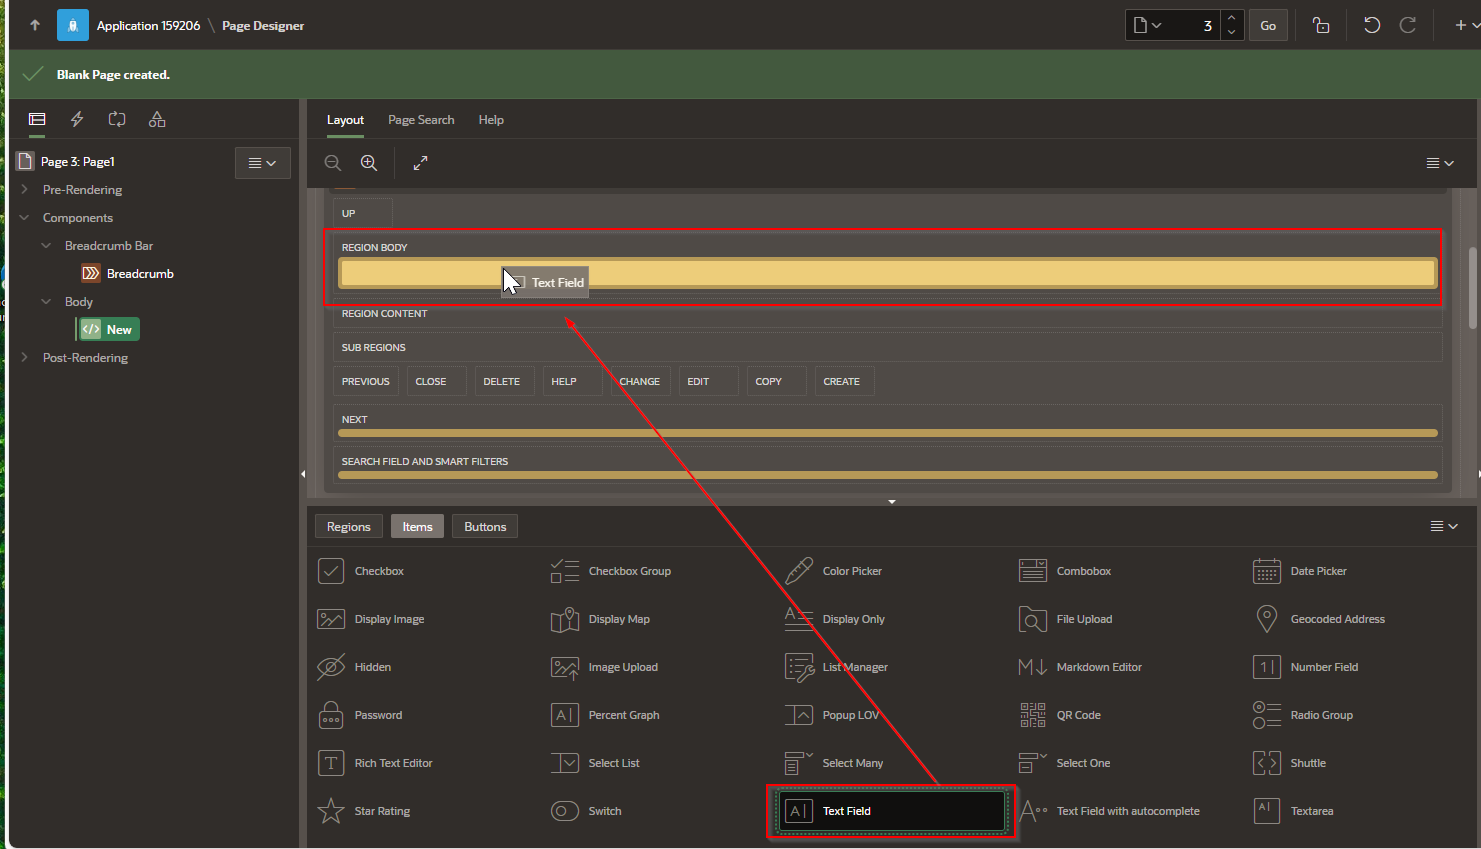
Now you should see your new control in two places (on the left and the right), both represents the same region. FYI: regions are somewhat synonymous to “DIV” in an HTML web page.
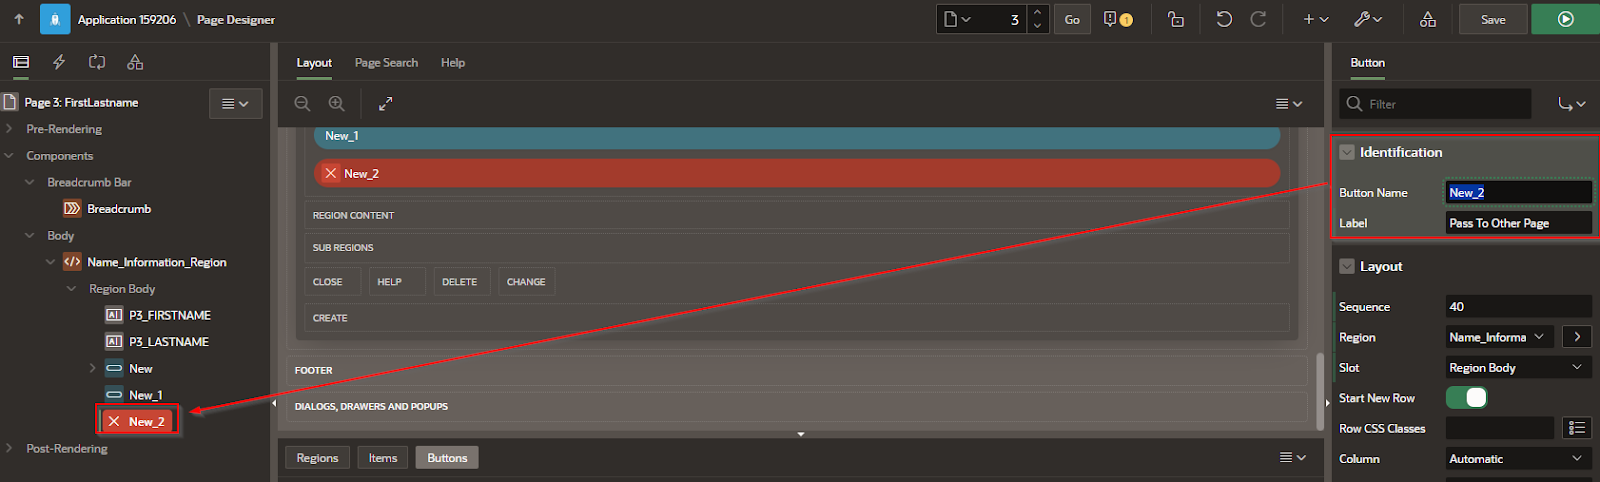
Step 6: Changing the name of the field and Page
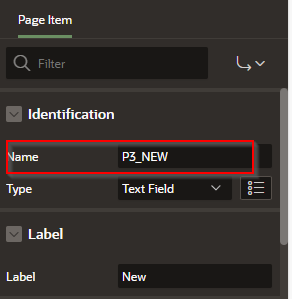
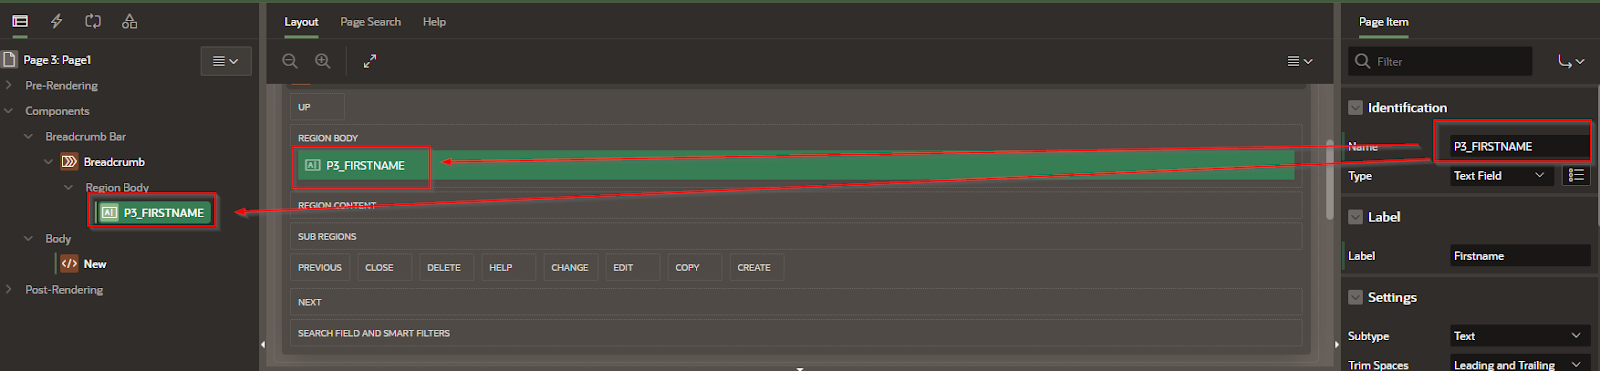
To improve clarity and maintainability, it's a good practice to rename fields and pages with meaningful identifiers. In the Page Designer, select the field you want to rename. On the right-hand side under the “Property Editor,” locate the “Name” property in the Page Item section. Update the name to something descriptive—such as P1_USERNAME instead of the default like P1_TEXT_FIELD1.
To rename the page itself, click on the page node at the top of the layout tree. In the Identification section on the right, you can update both the Page Name and Page Title. This name will appear in your app’s navigation and help you stay organized as your application grows. Once changes are made, be sure to save your work.
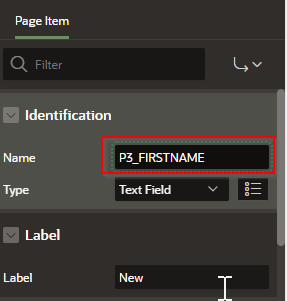
You can rename a field by going to the right hand “Page Item” area. In the “Name” field, change the current field name to the new name.
The field name has now displays the new name given to the control.
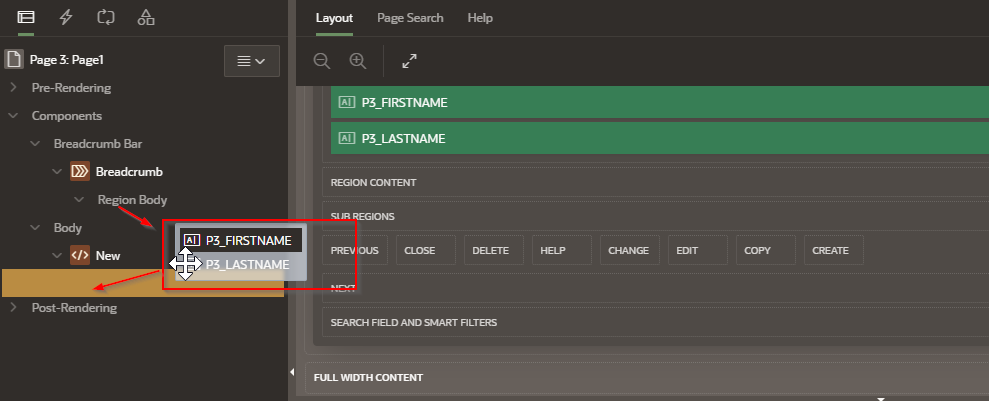
Moving fields around the page
Oracle APEX makes it easy to rearrange fields visually within a page using the Page Designer. If you’ve added multiple fields and want to organize them more effectively, simply drag and drop the field items in the layout section.
For example, if you created a new region called “Information” and want to move existing fields into it, locate the fields under the layout tree on the left, then drag them into the “Information” region’s “Region Body.” You’ll see the changes reflected both in the layout editor and in the visual preview on the right.
This flexibility allows you to structure your forms or display regions in a way that’s intuitive and user-friendly, without writing a single line of code.
Notice that the following page shows the two fields above the “New” Region
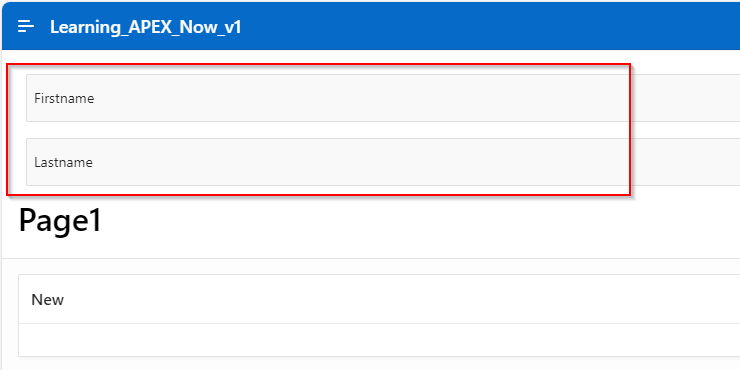
Drag the two fields to the “New” region
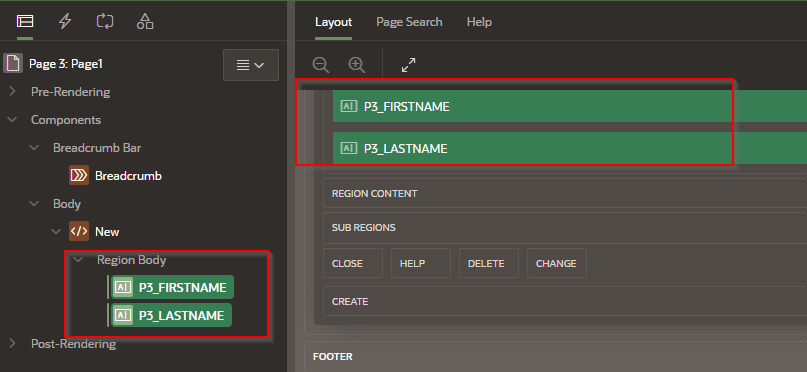
The fields should look like the following.
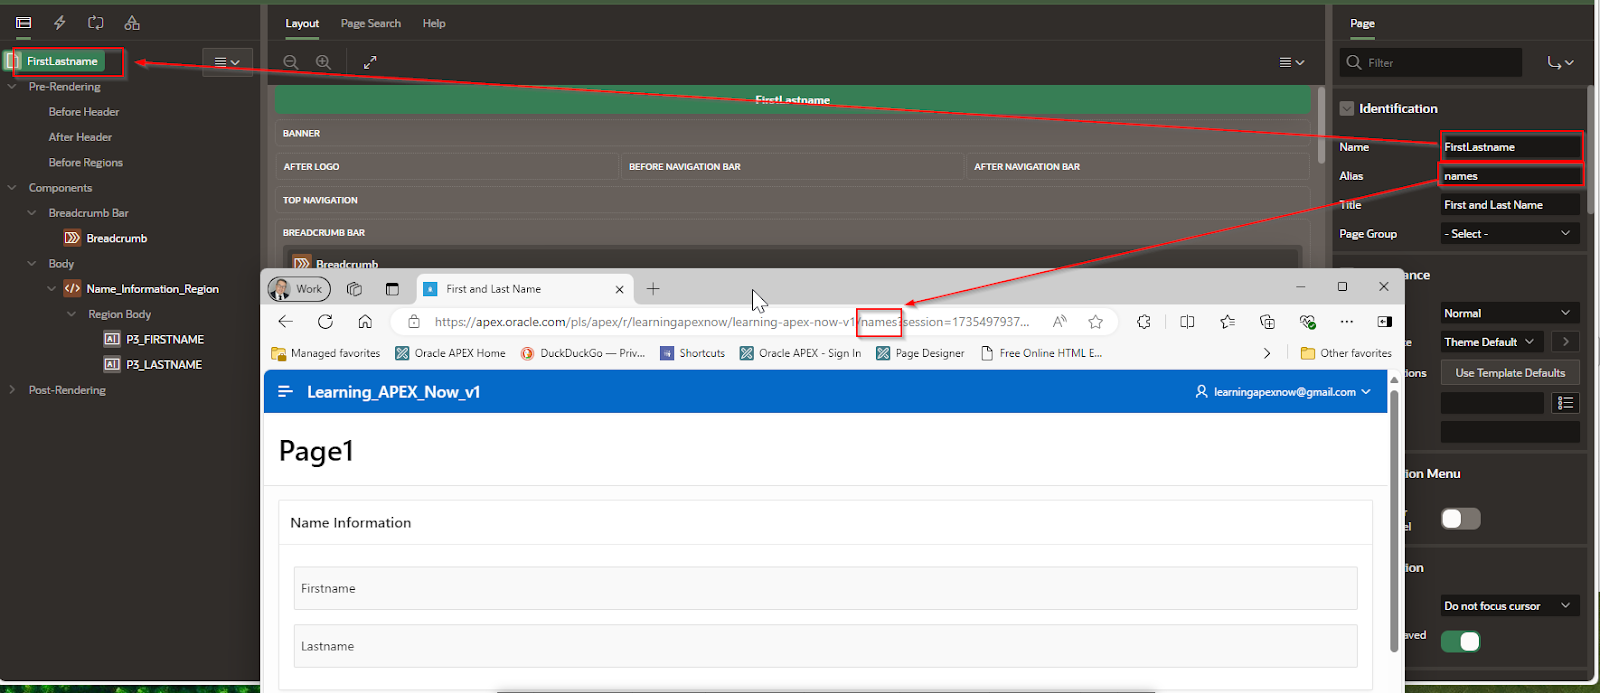
Changing the title of a page
To customize how your page appears in the application, you can easily change its title. In the Page Designer, select the page node from the left-hand tree view. Then, in the Identification section on the right, locate the Page Title field.
Update the title to something more meaningful or user-friendly, such as “Customer Details” or “Order Summary.” This new title will appear in the browser tab and can also be used in navigation menus, helping users understand the purpose of the page at a glance.
Once updated, save your changes to apply the new page title throughout your application.
Select the “Page” at the top of the left hand tree.
Make changes to the Identification area
Notice the changes below
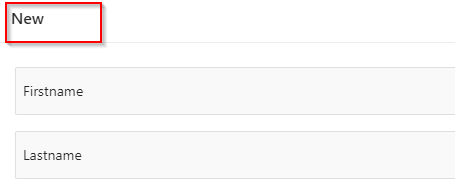
Step 7: Setting a region’s display tittle
Regions in Oracle APEX act as containers for your page content, and each region can have its own display title or header. To change a region’s title, select the region in the Page Designer—you can find it listed under the page’s layout tree.
Next, go to the Identification section on the right and locate the Title property. Enter the new display title you want, such as “Information,” “User Details,” or any label that fits the content inside the region.
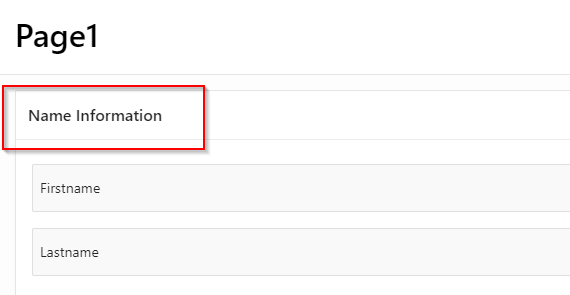
This title will appear as the header for that region on your page, helping users quickly understand the context of the information presented. Don’t forget to save your changes to see the updated region title in your application.
Lets change the Region from “New” to “Information”
Navigate to the Region’s Identification area.
Change the title to display a new Title header
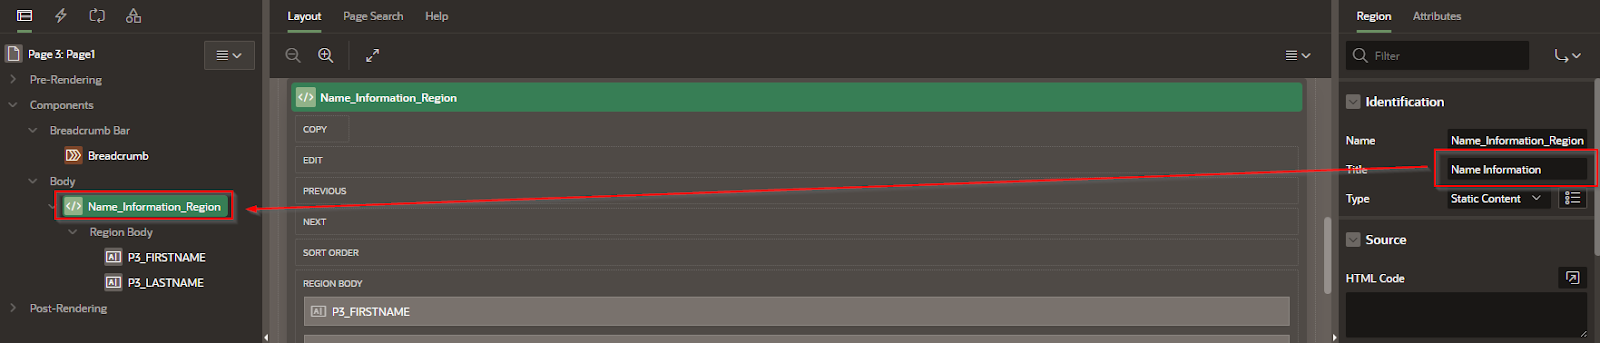
The change will display as follows
Step 8: Adding a button
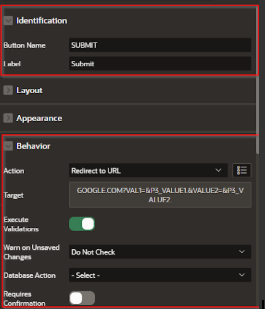
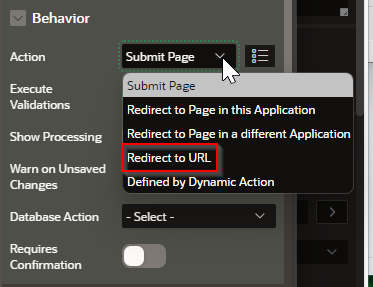
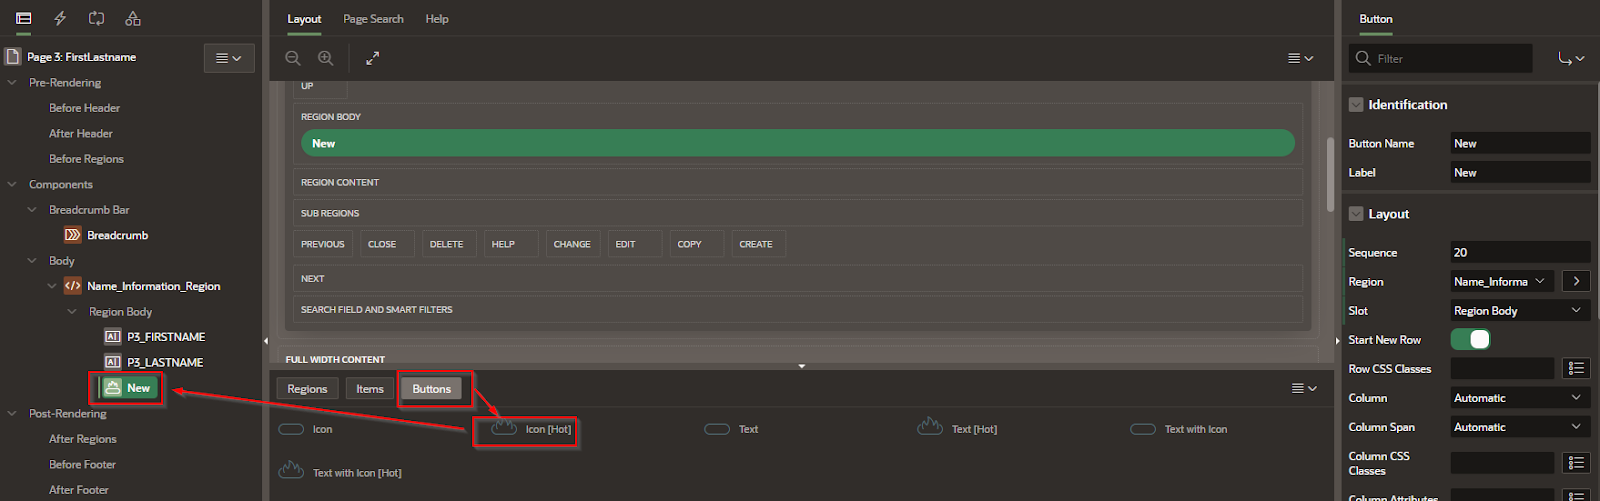
To add interactivity to your application, you can easily add buttons using the drag-and-drop interface in the Page Designer. Locate the Buttons section in the component palette, then drag a Button item onto the desired region or button position on your page.
APEX regions support multiple button layout locations—such as Above Region, Inline, Below Region, or Right of Region—so choose the placement that best fits your design. Once added, you can customize the button’s label, appearance, and behavior via the Property Editor.
Buttons in APEX trigger actions through Dynamic Actions or JavaScript, allowing you to define client-side behaviors without coding by using simple wizards. This makes it easy to create buttons for submitting forms, navigating pages, or performing custom tasks within your app.
Drag and drop button from the buttons area
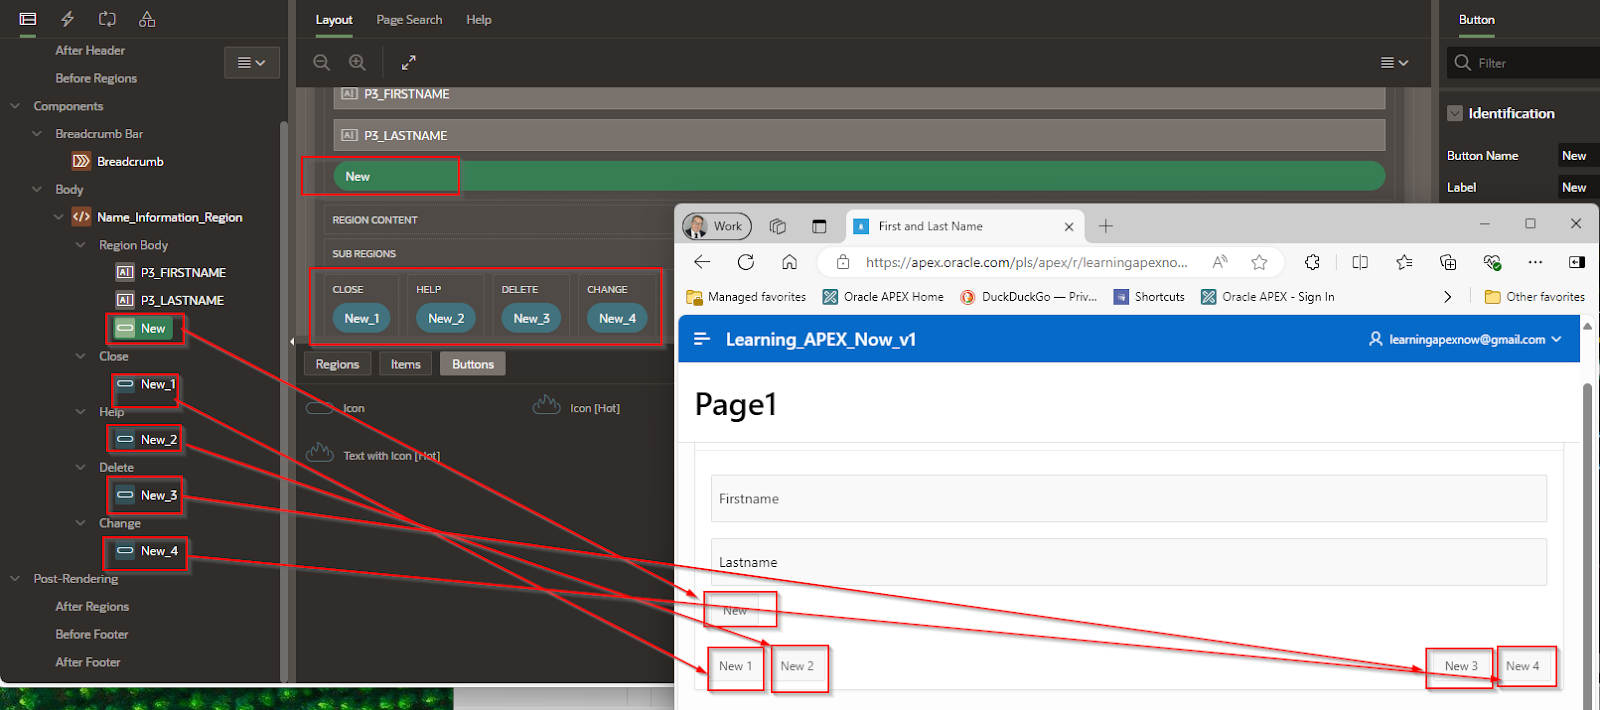
Button Layout locations
The regions have 4 locations that can hold buttons. See below.
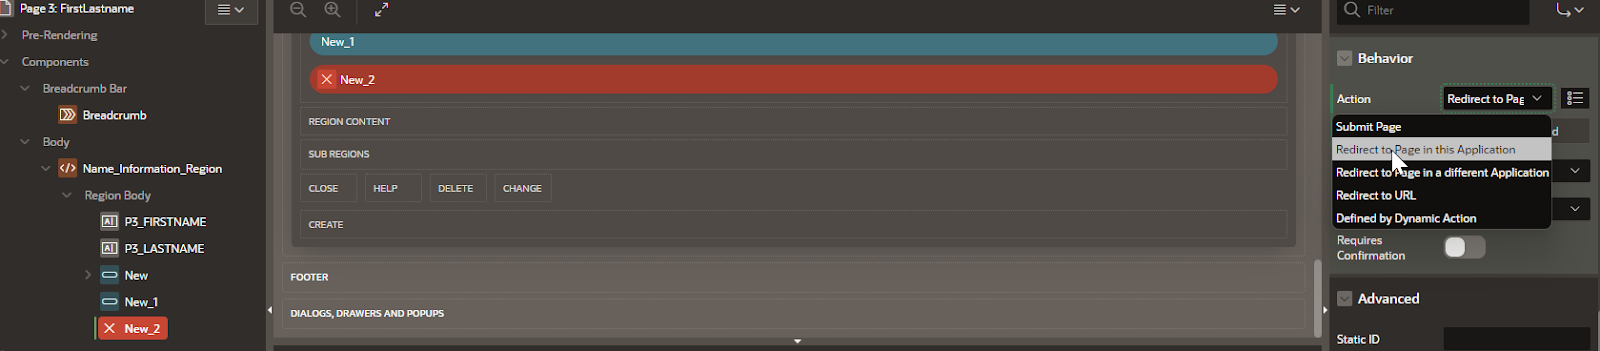
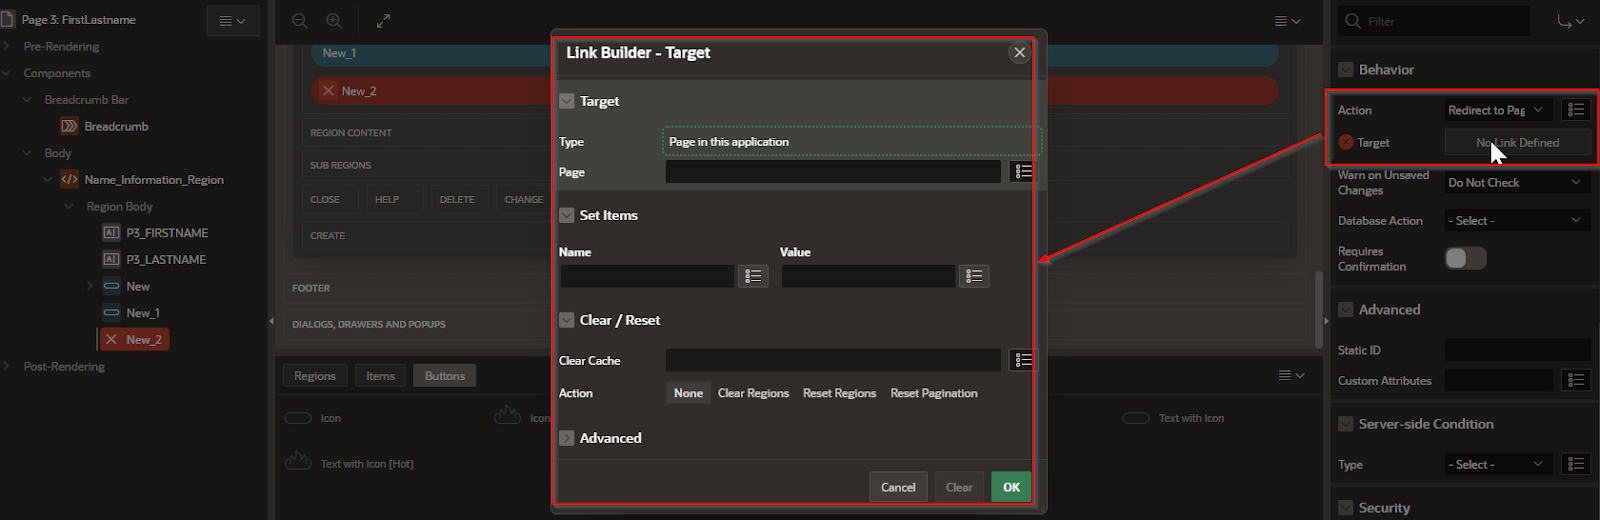
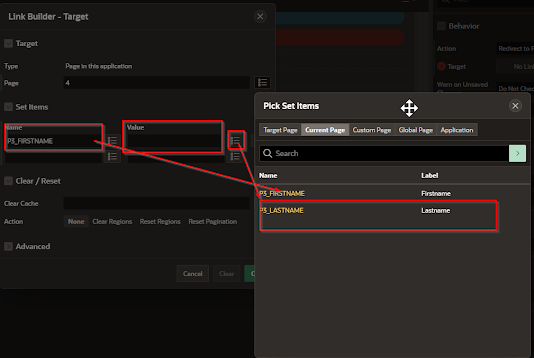
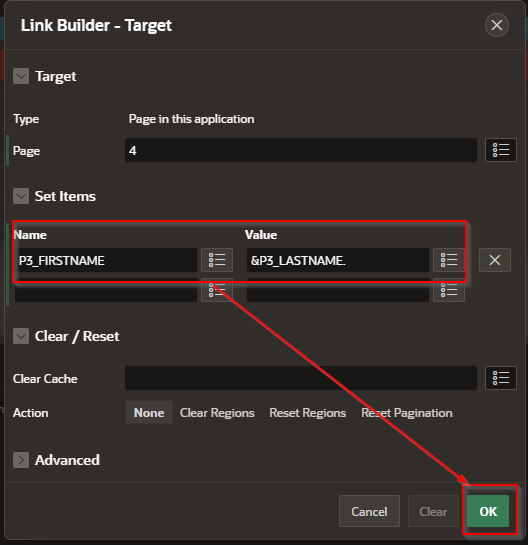
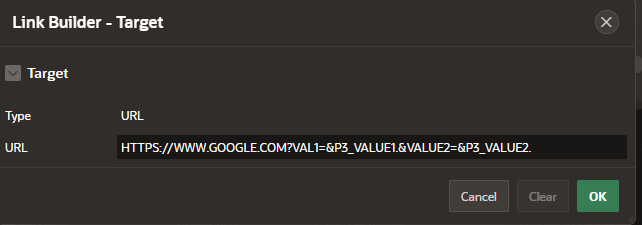
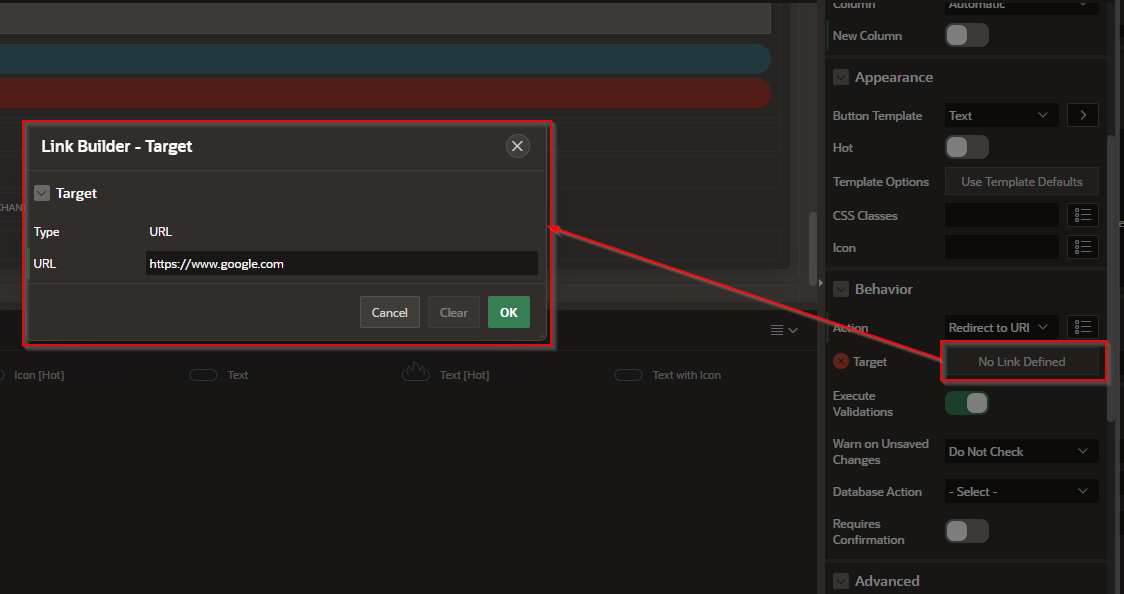
Creating Button actions
Button Layout Locations
In Oracle APEX, regions provide multiple predefined locations where you can place buttons to organize your page layout effectively. The common button layout positions include:
Above Region: Places the button above the main content area of the region.
Inline: Displays the button within the region header, usually aligned with the title.
Below Region: Positions the button below the region’s content area.
Right of Region: Places the button to the right side of the region header or content, depending on the layout.
Choosing the appropriate button location helps improve user experience by placing controls where users expect to find them. You can set the button’s position in the Property Editor under the button’s Layout settings when you select the button in Page Designer.
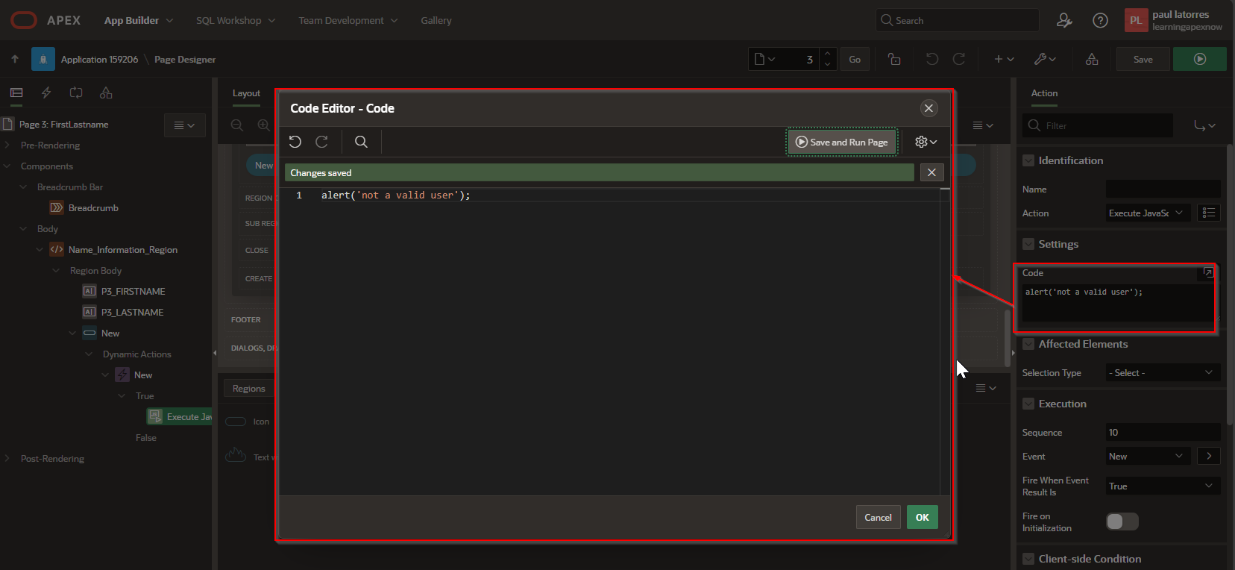
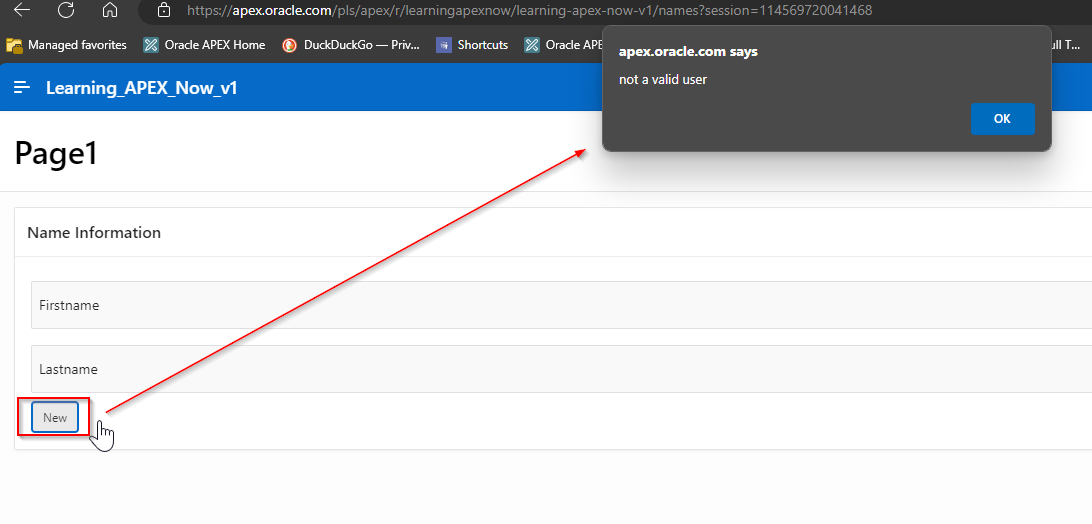
Buttons work via Dynamic Actions and Java Script. In APEX, Dynamic Actions provide developers with a way to define client-side behavior declaratively without the need to know JavaScript. Using a simple wizard, developers can select a page item, a condition, enter a value, and select an action.
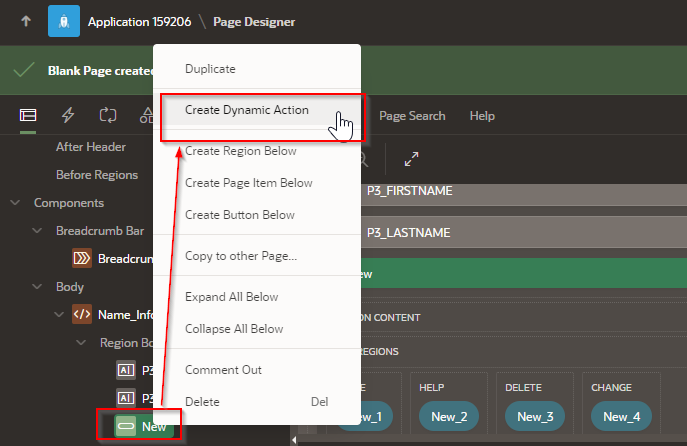
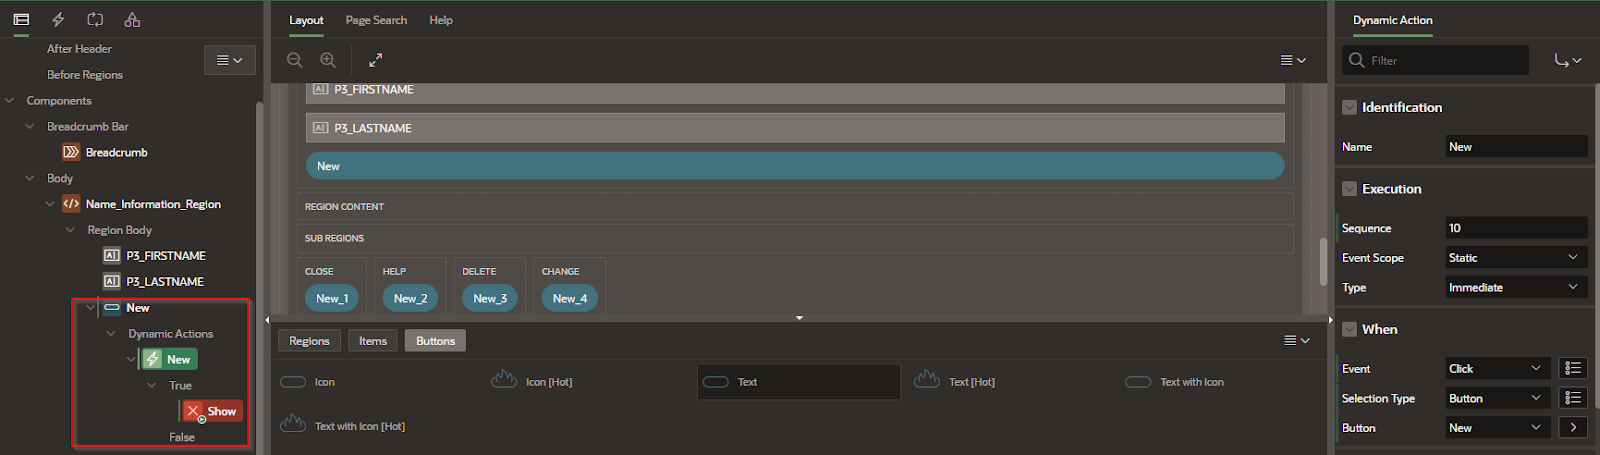
Adding the Dynamic Action will create a dynamic action and a True / False actions. In this case we see a new action under the “True” branch.
Final Thoughts
By following these step-by-step instructions, you've now created a basic yet functional Oracle APEX application—from selecting the app type, designing pages and regions, to adding interactivity through buttons and dynamic actions. Along the way, we explored the power of the Global page and how reusable fields like P0_SPECIALID can provide consistency across your application. While this guide focuses on the essentials, APEX offers a rich set of tools and customizations to help you scale your app as needed. With your foundational setup complete, you're ready to begin refining, testing, and expanding your application to meet real-world needs.