How to Make and Use Workflows in Oracle APEX
Workflows in Oracle APEX help automate processes by defining a series of steps, conditions, and approvals. A workflow ensures that business processes follow a structured and repeatable path. This tutorial explains how to create, configure, and use workflows in APEX using APEX Automations and Oracle Workflow Engine.
Workflows is all about automating business processes that move documents, tasks, and information from one participating user to another while following a set off rules defined by the developer.
Important--- A workflow does not return a value via a parameter.
Understanding Workflows in APEX
A workflow consists of:
Steps: Actions that need to be performed.
Conditions: Rules that determine how the process flows.
Approvals: Checks and verifications before moving to the next step.
Notifications: Alerts sent when actions are required.
Workflows can be used for:
Approval processes (e.g., expense approvals, leave requests).
Data validation and transformation (e.g., checking order details before processing).
Automated notifications (e.g., sending emails based on user actions).
Creating a Workflow in APEX
Step 1: Enable APEX Automations
Log in to Oracle APEX.
Open your application.
Go to SQL Workshop > RESTful Services and ensure that REST-enabled SQL is available (needed for some automations).
Navigate to Shared Components > Automations.
Click Create to start a new automation process.
Step 2: Define Workflow Steps
Enter a name for the automation (e.g., “Expense Approval Workflow”).
Select a triggering event:
A table change (INSERT, UPDATE, DELETE).
A scheduled time (e.g., run every hour).
Choose the data source:
A database table.
A SQL Query.
Example Query:
SELECT request_id, amount, status FROM expense_requests WHERE status = 'Pending';
This fetches pending approval requests.
Step 3: Add Actions to the Workflow
Click Add Action to define workflow steps.
Choose an action type:
PL/SQL Code: Run a function or procedure.
Send Email: Notify a manager for approval.
Call Web Service: Integrate with external systems.
Update Table Row: Change status after approval.
Example PL/SQL Action to mark an expense as approved:
UPDATE expense_requests
SET status = 'Approved'
WHERE request_id = :REQUEST_ID;
Step 4: Add Approval Conditions
Click Add Condition.
Set conditions based on column values.
Example:
If amount > 1000, require manager approval.
If amount ≤ 1000, approve automatically.
Condition Query:
SELECT CASE
WHEN amount > 1000 THEN 'Manager Approval Required'
ELSE 'Auto Approved'
END AS approval_status
FROM expense_requests;
Using the Workflow in APEX Pages
Once the automation is set up, it can be integrated into APEX pages:
Approval Dashboard
Create an Interactive Report with SELECT * FROM expense_requests;.
Add a button for managers to approve or reject requests.
Automated Email Notifications
Use Send Email Action in APEX Automations to notify managers.
BEGIN
APEX_MAIL.SEND (
p_to => 'manager@example.com',
p_from => 'system@example.com',
p_subj => 'Expense Approval Required',
p_body => 'A new expense request requires your approval.'
);
END;
User Notifications
Use APEX Messages to show alerts when an expense is processed.
Add a Success Message in APEX Processing Steps.
Benefits of Using Workflows in APEX
Workflows in APEX streamline business processes, reduce errors, and improve automation. They can be used in approval systems, ticketing solutions, inventory management, and many other applications.
EXAMPLE:
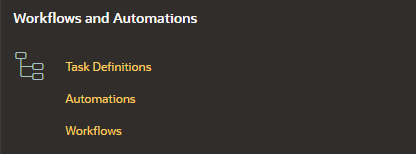
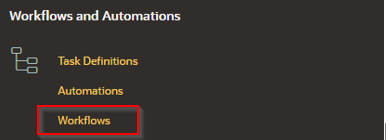
Creating the Workflow is created by navigating to Shared Components > Workflows and Automations
That carries us to Workflow definition, this is the area that will be used to create the complete workflow. A workflow is made from various workflow actions
Workflow – This is the top level of the workflow.
Version – Sets the specific state of workflow. A workflow can be placed in one of three version.
You can only run one workflow a version at a time. When you’re working on your workflow it is set to Development, once you’re done working on the workflow you then set it to Active. Only one workflow can be active at a time. Any workflow that is not set to Active will be set to Inactive.
Each Workflow Version is made from the following:
Parameters – Workflow input variables that are used to pass values into the workflow. These are the values that will be used to define the activities within the workflow.
Variables – Variables used inside of the workflow.
Activities -Specific action available to be used within the workflow.
Connections – These link activities together.
Participants – The users that have privileges to operate within the workflow.
Activities – There are 9 types of activities available to workflows
Workflow Start
Human Tasks
Invoke API
Execute Code
Send Email
Send Push Notification
Switch
Wait
Workflow End

A workflow might look like the following in the workflow designer
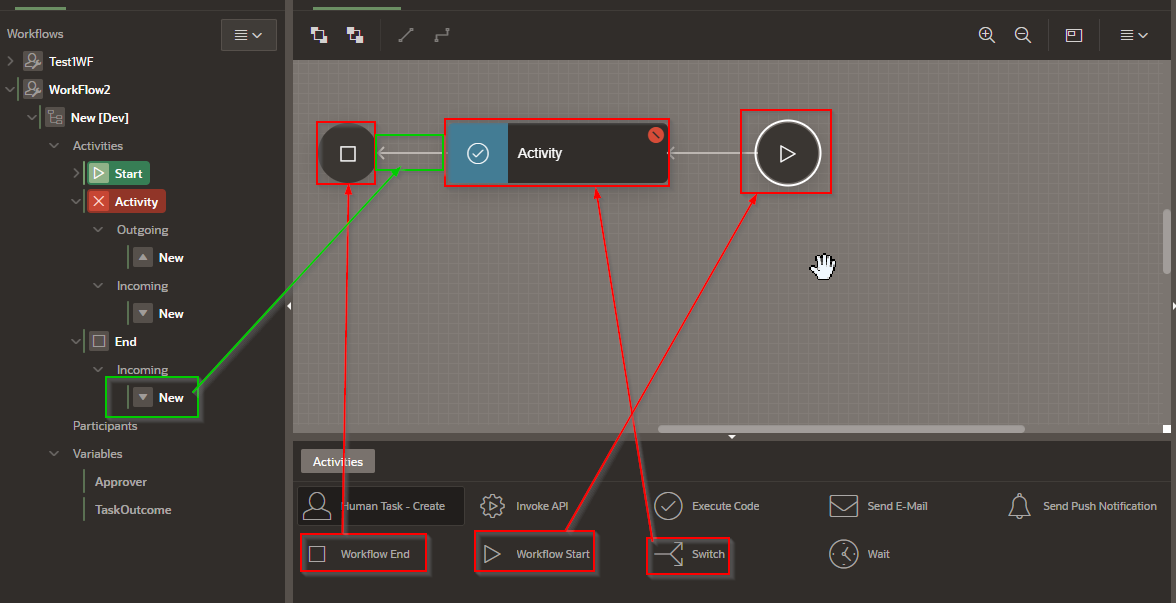
An example of a workflow
Requirements
We want to pass a number to the workflow. If the number is greater than 100 then we are going to save the value into a table with a message that states which branch was chosen(True or False).
We want to display the workflow id back into the application page.
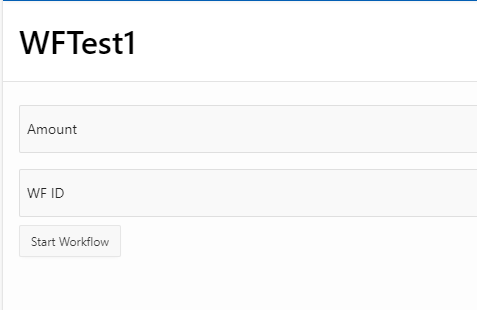
Step 1 – Create the initiating page with two fields and one button
Item - Amount
Item - WFID
Button - StartWorkflow
It should look something like this:
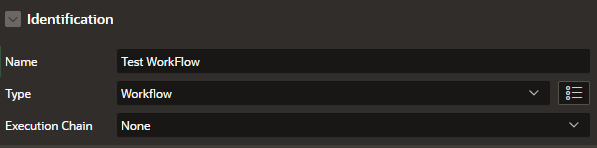
Step 2 – Create the workflow

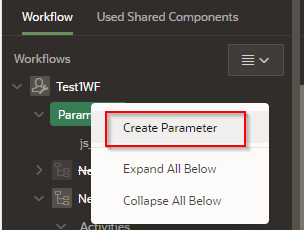
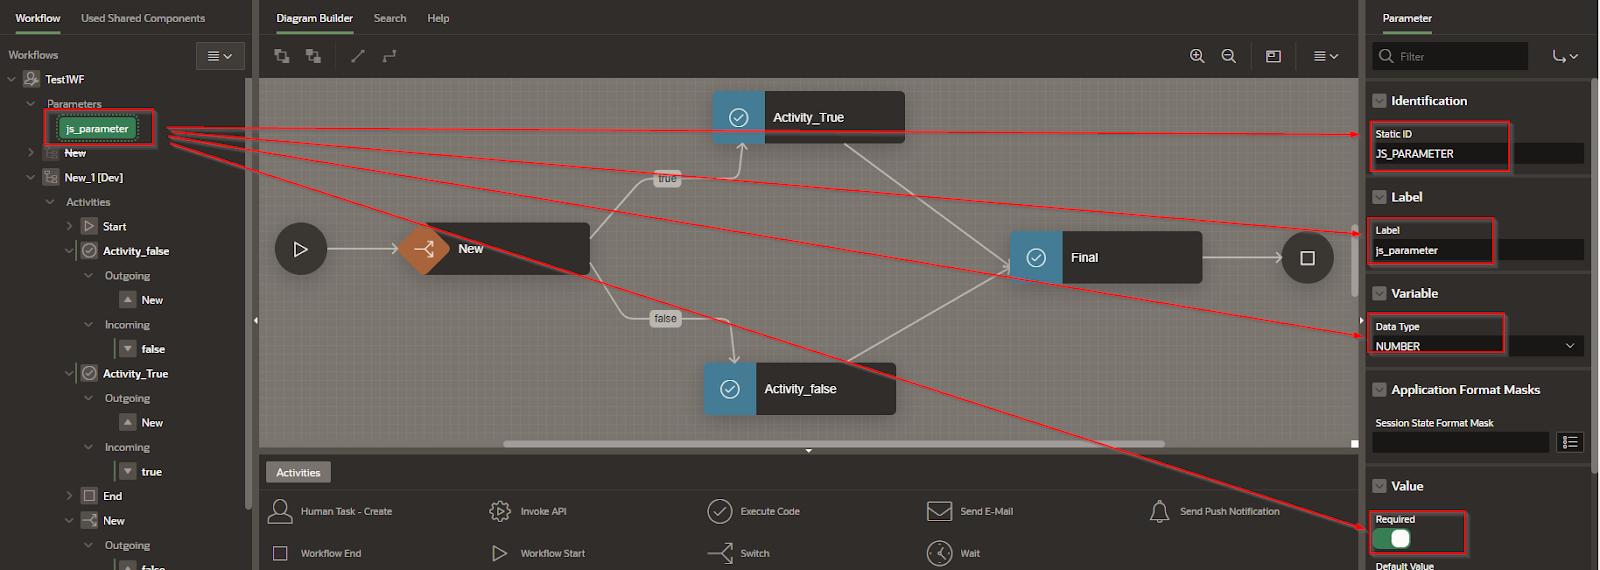
Step 3 - Set the parameter
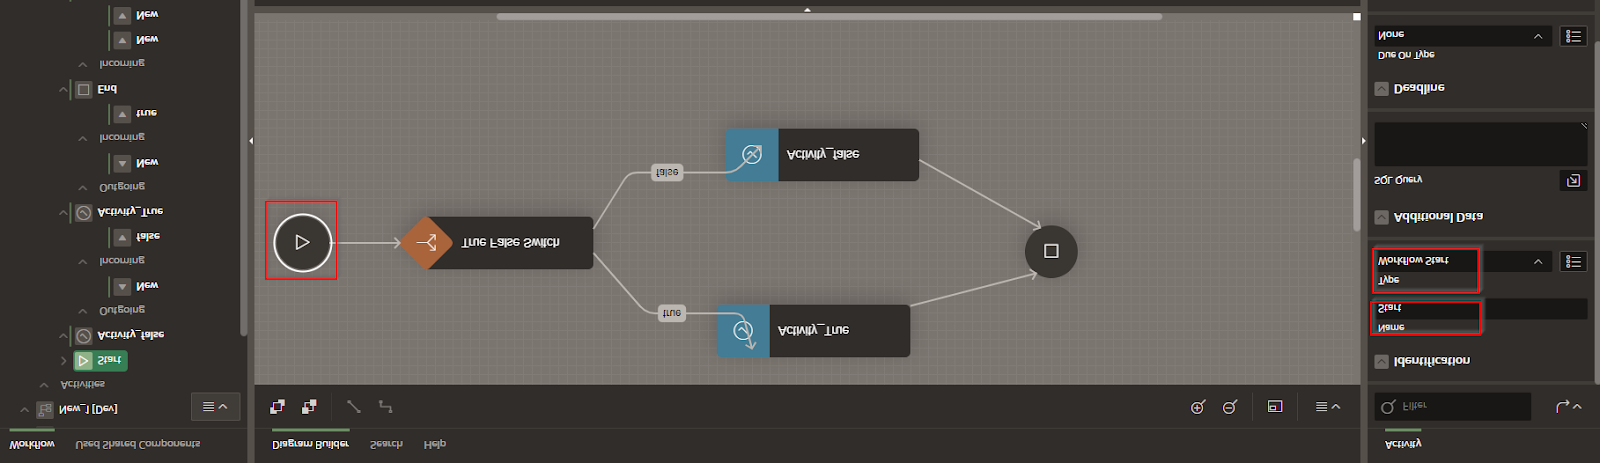
Step 4 – Set the “Start” Activity and change the values as follows.
Step 5 – Add the True/false switch and set the values
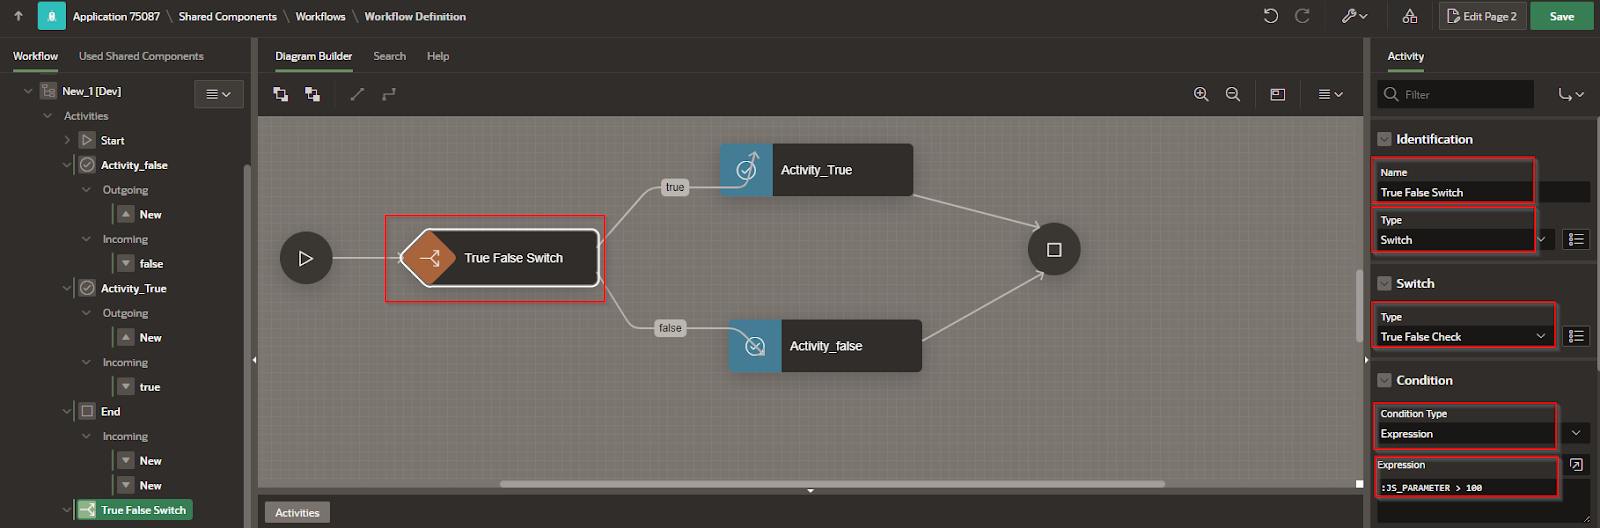
Set Name: True False Switch
Set Type: switch
Set Switch: Type > True False Check
Set Condition > Condition Type: Expression
Set Condition >Expression: “:JS_PARAMETER > 100”
Step 6 – Create “True” Activity
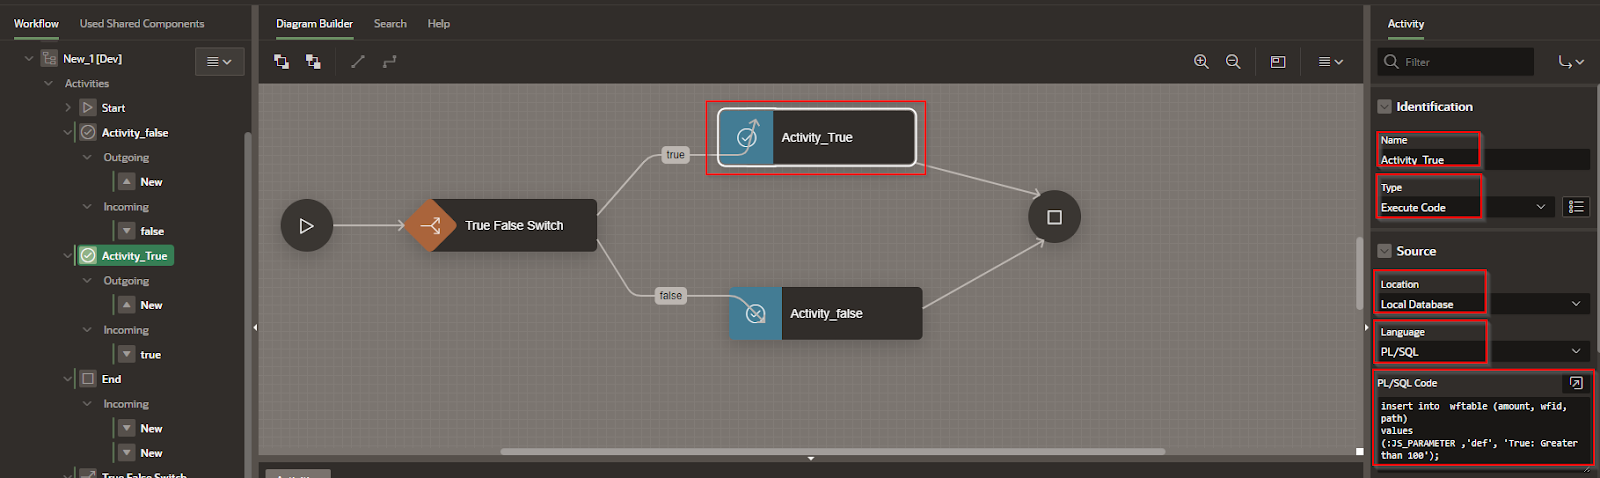
Set Identification > Name > Activity_True
Set Identification > Type > Execute Code
Set Source > Local > Location Database
Set Source > Language > PL/SQL
Set Source > Local > PL/SQL Code
Here is the code:
insert into wftable (amount, wfid, path)
values
(:JS_PARAMETER ,'def', 'True: Greater than 100');
Step 7 – Create “False” Activity – duplicate the “True” activity with the following changes
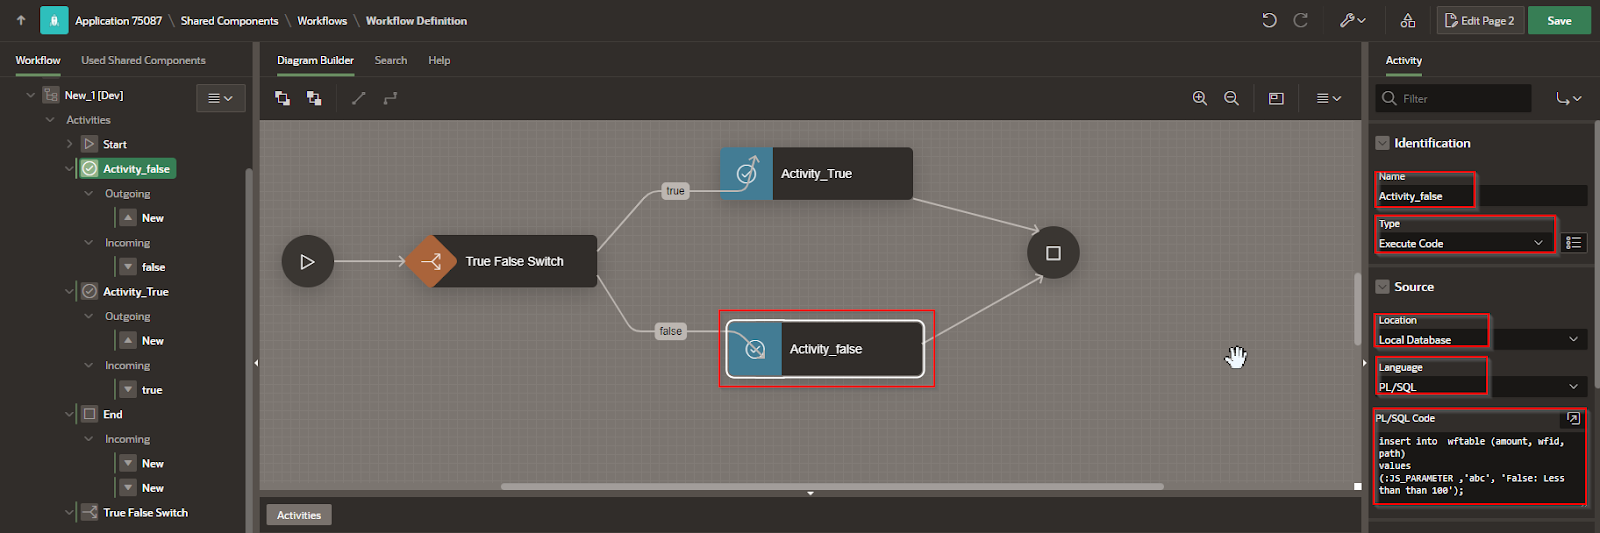
Set Identification > Name > Activity_false
Set Source > Local > PL/SQL Code
Here is the code:
insert into wftable (amount, wfid, path)
values
(:JS_PARAMETER ,'abc', 'False: Less than than 100');
Step 8 – Create the “End” activity.
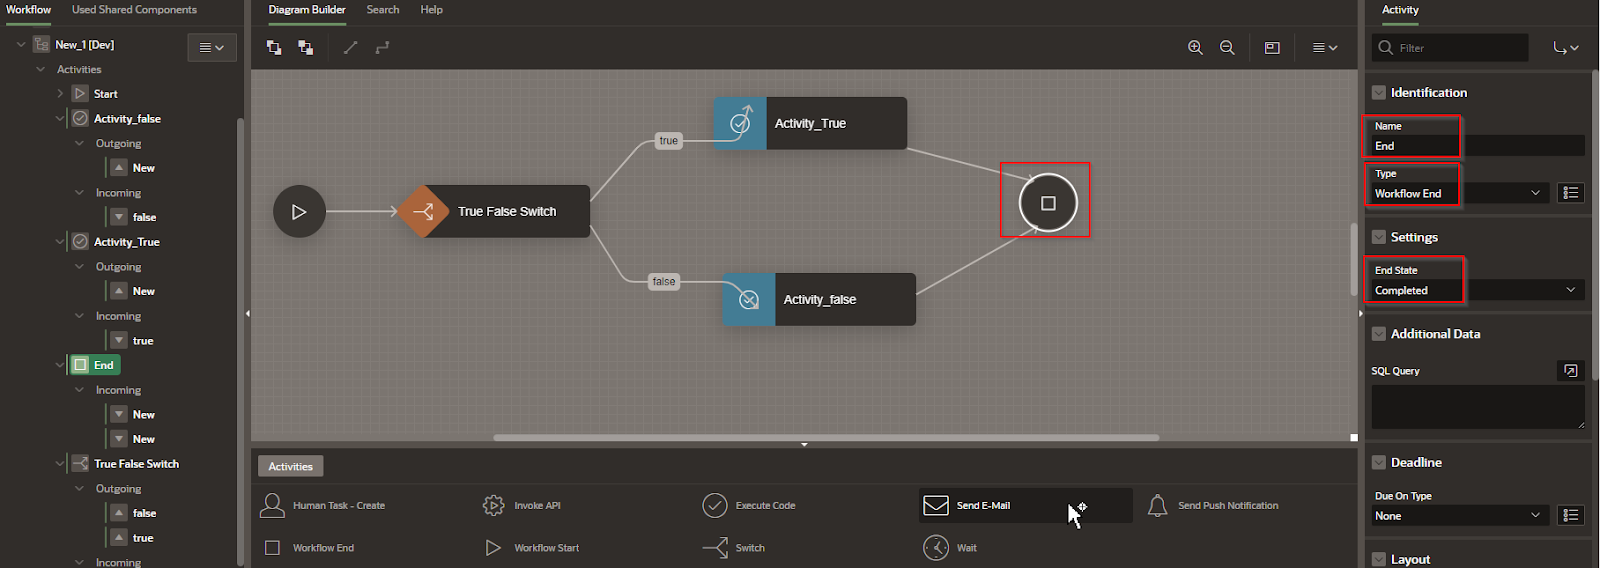
Identification > Name: End
Identification> Type > Workflow End
Settings > End State > Completed
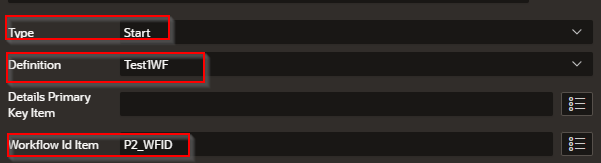
Step 9 -Create a process in the request page
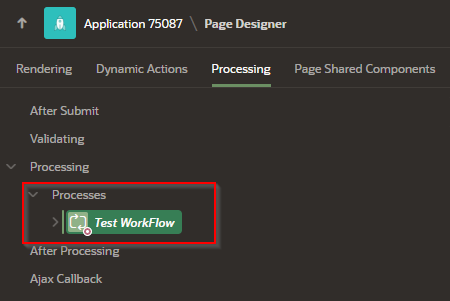
Add the following changes
Set the type to “Start”
Definition: Set the name of the definition to the name of the Workflow
Workflow Id Item: This sets the Workflow’s id into the P2_WFID textbox in the page.
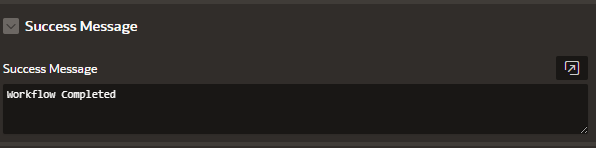
This setting is the Success message that gets displayed after the object is processed
Looks like this:


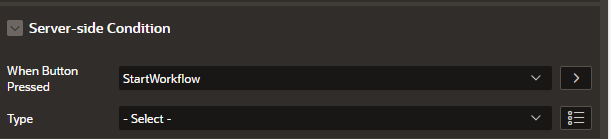
Set the server-side condition:
---StartWorkflow is the name of the button that will fire off the process.
Step 10 – Set the Parameter
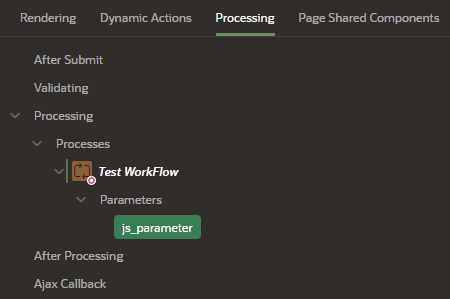
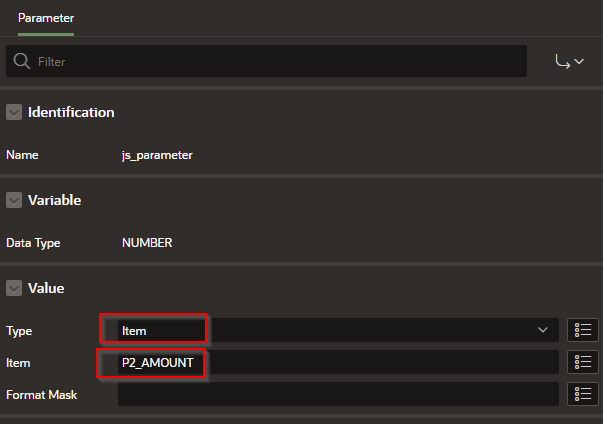
This passes the value from P2_AMOUNT to the workflow’s parameter.


