Adding a row to a table using a button in Oracle APEX is a common requirement for creating interactive and user-friendly applications. This functionality allows users to quickly insert new records into a table directly from the user interface without navigating away from the current page. By configuring a button to trigger a process that inserts data, developers can streamline data entry workflows and enhance the overall application experience.
Adding a row to a table with a button in Oracle APEX involves creating a user interface element (button) that, when clicked, triggers a process to insert a new record into the database table. This is a common feature in data entry applications to simplify the process of adding new information.
Step 1: Create a Button
-
Navigate to the Application Builder and open the page where you want to add the button.
-
In the Page Designer, under the region where the table or report is displayed, click on the “Buttons” node.
-
Click the “Create” button to add a new button.
-
Give the button a meaningful name such as “Add Row” or “New Record.”
-
Set the button position (e.g., above the report or in the page toolbar).
Step 2: Define a Process to Insert the New Row
-
Still in the Page Designer, navigate to the “Processing” section.
-
Click “Create” to add a new process.
-
Choose “PL/SQL” as the process type.
-
Write a PL/SQL block that inserts a new row into your target table. For example:
BEGIN
   INSERT INTO your_table_name (column1, column2, column3)
   VALUES (:P1_COLUMN1, :P1_COLUMN2, :P1_COLUMN3);
   COMMIT;
END;
Replace your_table_name and the columns with the actual table and columns you are working with. The bind variables like :P1_COLUMN1 refer to page items where the user inputs data.
Step 3: Set the Button to Submit the Page
-
Go back to the button properties.
-
Set the button action to “Submit Page.”
-
Set the “Request” value to something meaningful, such as
ADD_ROW. This value will be used to identify the process triggered by this button.
Step 4: Condition the Process to Run on Button Click
-
In the process you created, set a condition to run only when the button is pressed.
-
Use the condition “When Button Pressed” and select the button you created (e.g., “Add Row”).
Step 5: Refresh the Region
-
To see the new row added immediately, set up a Dynamic Action to refresh the report or region after the process completes.
-
Create a Dynamic Action on the button click event.
-
Add a True Action of type “Refresh” and select the region displaying the data.
Step 6: Test Your Setup
-
Run the page.
-
Enter the data into the form items corresponding to the columns.
-
Click the “Add Row” button.
-
The PL/SQL process inserts the row, commits the transaction, and the report region refreshes to show the new row.
This approach ensures that users can add new data seamlessly via a button click, maintaining a smooth and interactive application experience. With Oracle APEX’s declarative framework combined with PL/SQL, this process is efficient and easy to manage.
Example
In this example we are going to use two fields and one table
Fields: P10_NEW_1 and P10_NEW_2
Table:
Using Table1
Has 3 columns
ID
VALUE1 – varchar2
VALUE2- varchar2
Has 1 button: named “add”
Step 1 -Create a page with both fields and a button
Step 2- Add a dynamic Action to the button
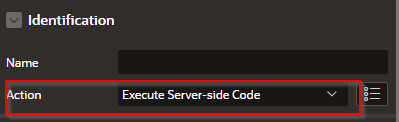
Step 3- In the Dynamic Action TRUE section
In Identification choose Action: Execute Server-side Code
In the Settings
Language (PL/SQL)
PL/SQL Code: Add the following code
INSERT INTO TABLE1 (value1,value2)
VALUES(:P10_NEW_1,:P10_NEW_2);

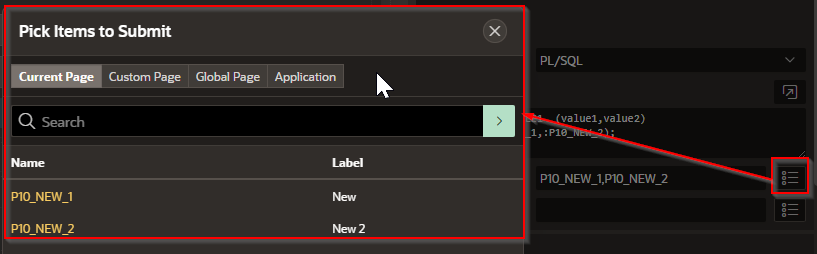
In the Items to Submit enter all of the fields that you want to pass to the database. If you don’t do this then the values are not entered into the database.
Implementing a button to add a new row not only improves usability but also helps maintain data consistency and integrity by guiding users through predefined input forms or processes. With Oracle APEX’s declarative features and PL/SQL integration, adding this capability becomes straightforward and efficient, enabling rapid application development.


