Introduction
Displaying spatial data in a visual, interactive way is increasingly valuable in modern applications. In Oracle APEX, Map Reports offer a powerful and intuitive way to represent geographic information directly within your application. Whether you're tracking locations, plotting assets, or visualizing regions with business data, a Map Report provides an effective tool to enhance the user experience and bring location intelligence into your APEX apps.
Detailed Instructions: How to Work with a Map Report in Oracle APEX
To work with a Map Report in Oracle APEX, follow these steps:
-
Prepare Your Spatial Data
-
Make sure your table contains spatial data in the form of
SDO_GEOMETRYor longitude/latitude pairs. -
Example table:
CREATE TABLE store_locations (
  id           NUMBER,
  store_name   VARCHAR2(100),
  longitude    NUMBER,
  latitude     NUMBER
);
-
-
Create a Map Region
-
Open Page Designer, click Regions, then create a new Map region.
-
Set the Region Type to Map.
-
Choose the Data Source Type: SQL Query or Table/View.
-
If using SQL, provide a query with longitude and latitude columns.
SELECT id,
       store_name AS name,
       latitude,
       longitude
FROM store_locations
-
-
Configure Map Attributes
-
Under the Map Attributes, choose the map provider (Oracle Maps, OpenStreetMap, or others).
-
Set the marker layer to define what icons will be shown.
-
You can bind column values to tooltips, labels, and popup info windows for interaction.
-
-
Style the Map Markers
-
Go to the Appearance settings to assign marker icons based on data.
-
You can use different icons or colors based on location type, category, or status.
-
-
Add Interactivity
-
Use Dynamic Actions to respond to user clicks on map markers.
-
For example, when a user clicks a marker, you can redirect them to a details page or open a modal.
-
-
Test and Adjust Zoom
-
Customize the map’s initial zoom level and center point to best fit your data coverage.
-
-
Use RESTful Data Sources (Optional)
-
APEX also allows loading map data from REST APIs if your location data resides in external systems.
-
The first thing that you need to make a map work is a way to map your points of interest into the map. This can be done using one of three categories:
Geospatial Data Types in Oracle APEX
Oracle APEX supports multiple geospatial data formats, each suited for different use cases in mapping and spatial analysis.
1. SDO_GEOMETRY (Oracle Spatial Object Type)
SDO_GEOMETRY is a specialized Oracle Object Type used by Oracle Spatial to store and manipulate geographic data.
It includes details such as the coordinate system, geometry type, dimensions, and spatial data points stored in an array.
Ideal for map layers in APEX and advanced spatial operations.
Utilized by the SDO_UTIL and SDO_SAM packages for:
Calculating distances between points.
Performing spatial analysis and geometric transformations.
Supports all geometry types, including points, lines, and polygons.
2. GeoJSON (Geospatial JSON Format)
GeoJSON is a widely used JSON-based format for representing geographic data.
Follows the GeoJSON standard, making it easy to read and exchange between systems.
Oracle supports storing and indexing GeoJSON data.
Particularly useful in JavaScript-based applications and dynamic map interactions.
Supports all geometry types, including points, lines, and polygons.
3. Longitude/Latitude (2D Coordinates)
The simplest and most common way to represent locations on a map.
Uses two numeric values:
Longitude (X-axis) – Horizontal position.
Latitude (Y-axis) – Vertical position.
Familiar to most users and widely available in public datasets and APIs.
Suitable for basic mapping needs and integration with mapping tools like Google Maps.
Each of these geospatial data types serves a unique purpose in Oracle APEX, from simple mapping to complex spatial analytics.
EXAMPLE:
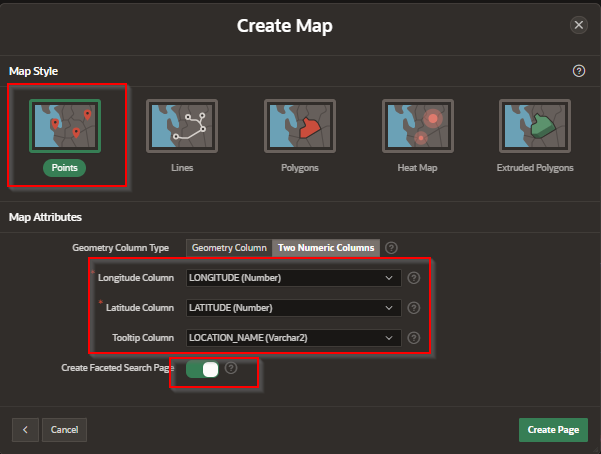
In this case we will use Longitude/Latitude.
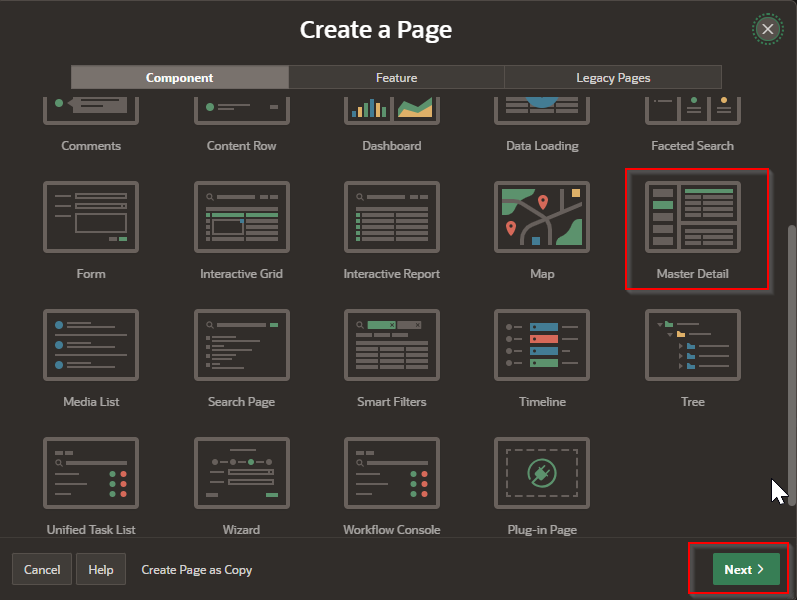
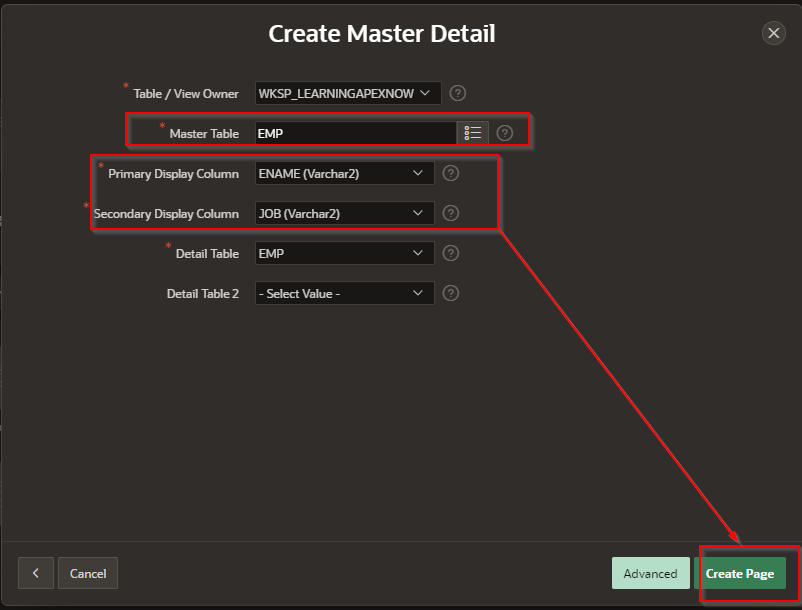
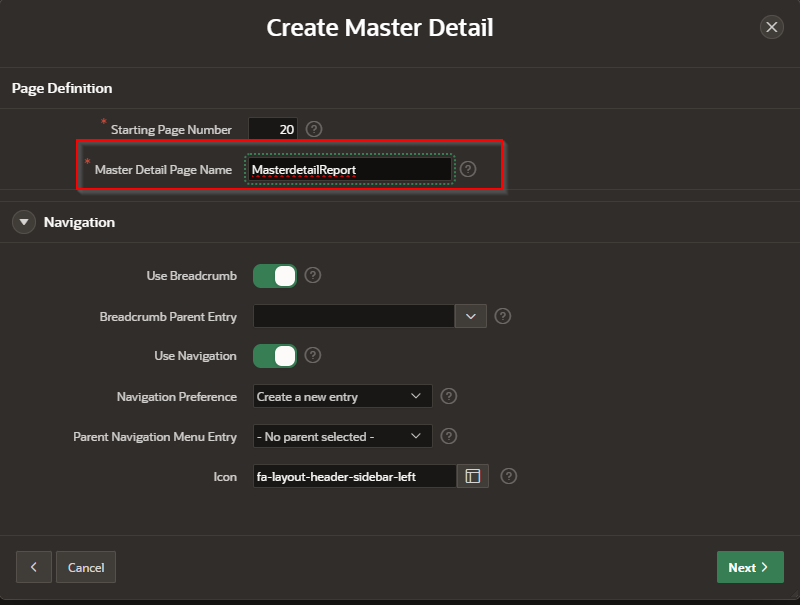
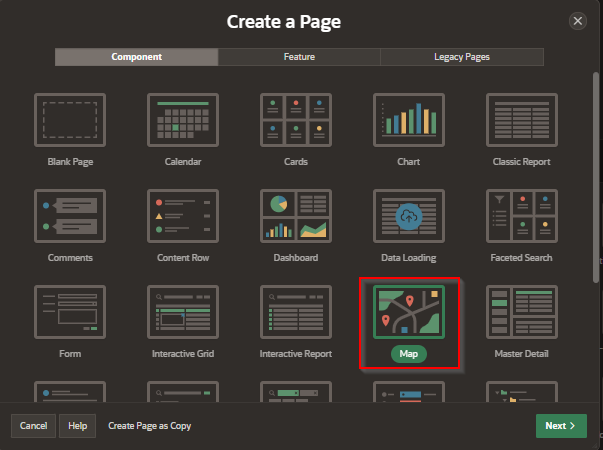
Step 1 – Create a map page
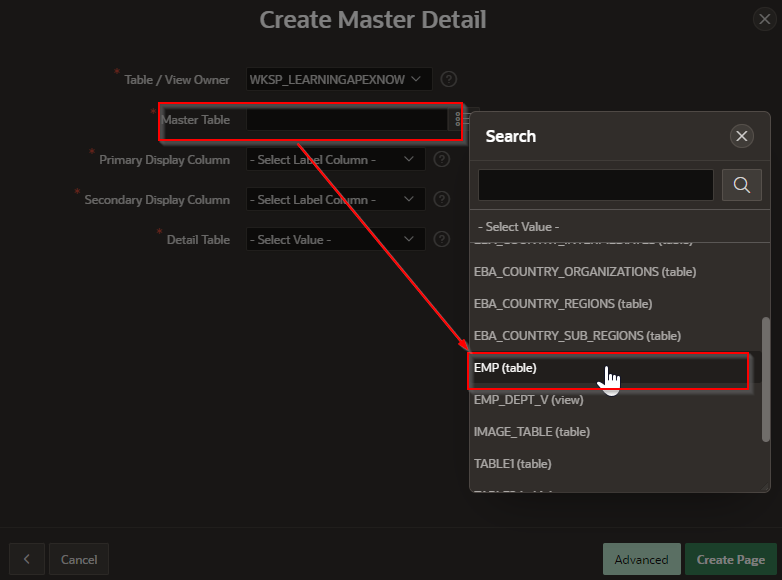
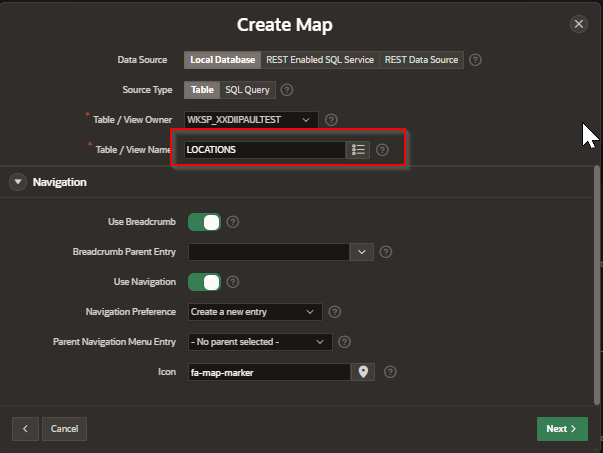
Select table
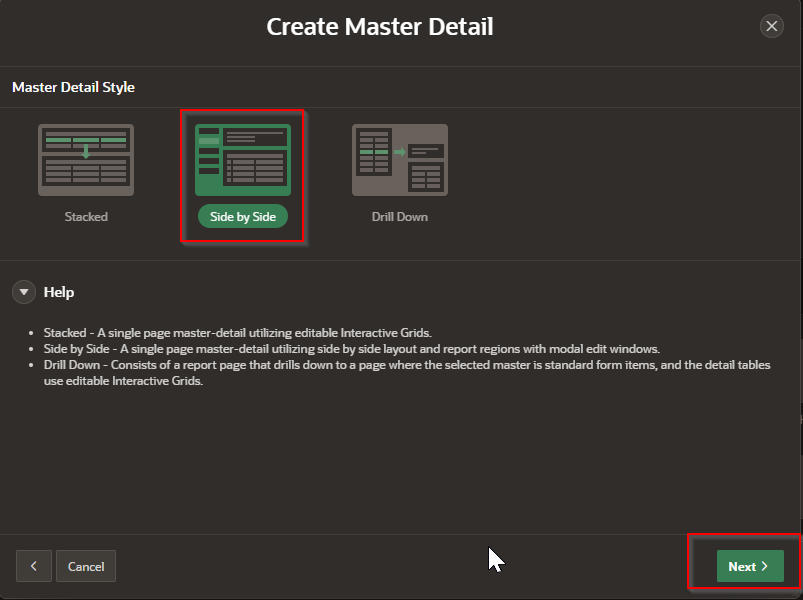
Select map style
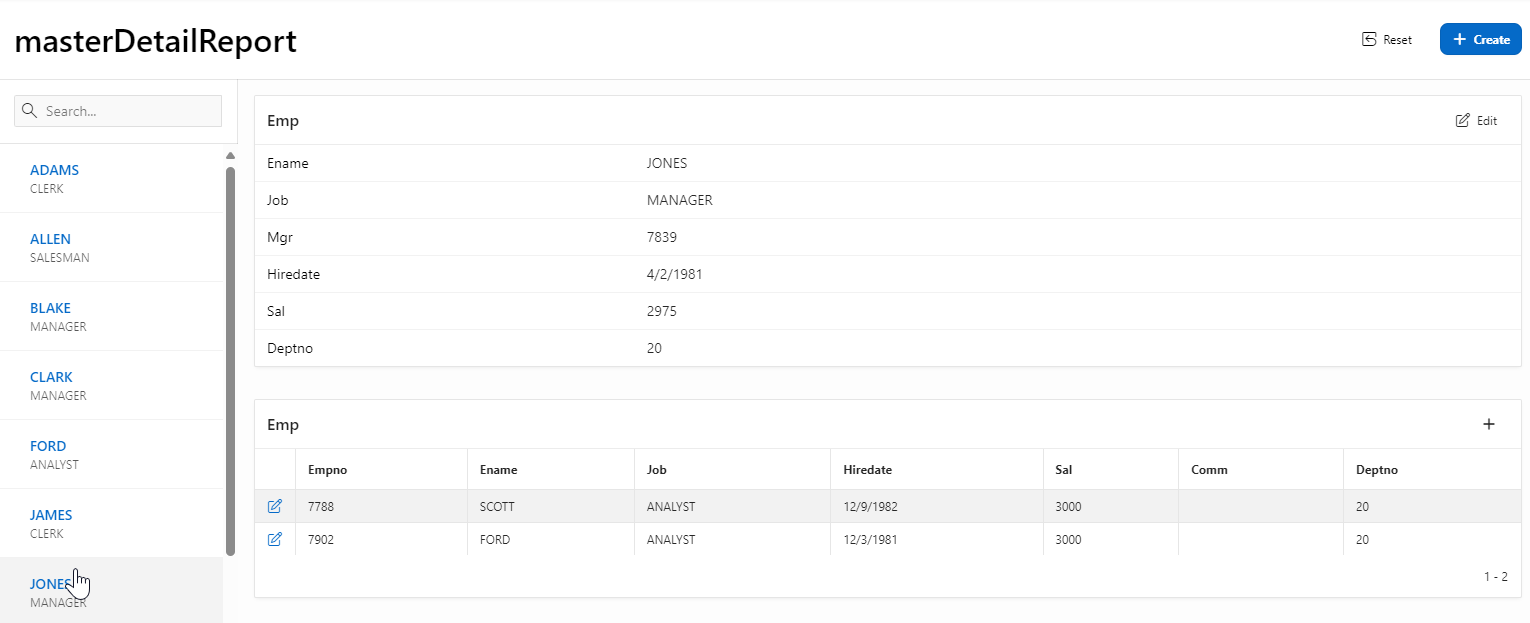
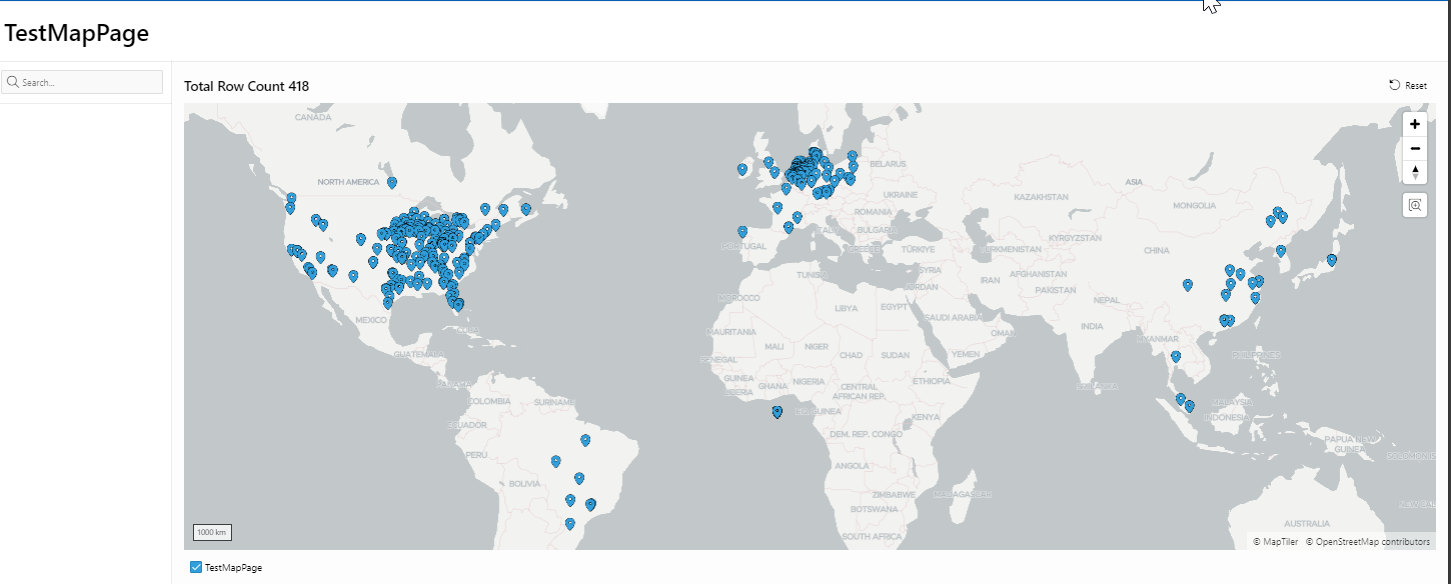
Save and Browse
Conclusion
Working with a Map Report in Oracle APEX allows you to visually represent data in ways that tables and charts cannot. With support for spatial queries, dynamic interactions, and beautiful visual styling, Map Reports help users explore, analyze, and act on geographic data with ease. Whether you're plotting store locations, delivery zones, or event venues, integrating a Map Report into your application elevates both functionality and user experience.