Creating Auto-Fill Text and Dropdown Controls in Oracle APEX
Auto-fill controls in Oracle APEX improve user experience by dynamically suggesting or completing text inputs based on database values. This can be done with Text Fields with Auto-Complete or Dropdown Lists with Search. This tutorial explains how to set up these features and enhance them using AJAX for better performance.
Creating an Auto-Fill Text Field
An Auto-Fill Text Field helps users enter data quickly by suggesting values as they type. This is useful for fields like product names, employee names, or cities.
Step 1: Create a Text Field with Auto-Complete
Open Page Designer.
Click Create → Item.
Select Text Field.
Name it, for example, P1_CUSTOMER_NAME.
Set Item Type to Text Field with Auto-Complete.
Step 2: Define the List of Values (LOV)
Under List of Values → Type, select SQL Query.
Enter a SQL query that retrieves relevant data.
Example for customer names:
SELECT customer_name FROM customers ORDER BY customer_name;
Save and run the page. The text field will now suggest names as the user types.
Step 3: Using AJAX for Large Datasets
If you have a large dataset, fetching all values at once can slow down performance. Instead, use AJAX Callback to retrieve suggestions dynamically.
Create an AJAX Callback Process
Navigate to Shared Components → Application Processes.
Create a new process and name it GET_CUSTOMER_NAMES.
Set the Process Type to PL/SQL.
Enter the following code:
DECLARE
v_query VARCHAR2(4000);
BEGIN
v_query := 'SELECT customer_name FROM customers WHERE customer_name LIKE :SEARCH || ''%'' ORDER BY customer_name';
APEX_UTIL.JSON_FROM_SQL(v_query);
END;
Save the process.
Modify the Auto-Complete Field to Use AJAX
Go to the P1_CUSTOMER_NAME field.
Under Advanced → Settings, set AJAX Callback to GET_CUSTOMER_NAMES.
The text field will now retrieve results dynamically as the user types.
Creating an Auto-Fill Dropdown List
A Dropdown List with Search allows users to quickly find and select options from a long list.
Step 1: Create a Select List
Open Page Designer.
Click Create → Item.
Select Select List.
Name it, for example, P1_PRODUCT.
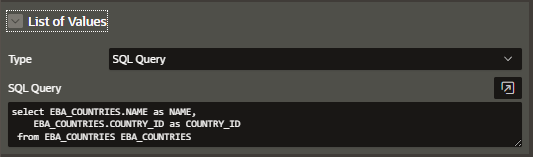
Under List of Values → Type, choose SQL Query.
Enter a SQL query to fetch data.
Example for a product list:
SELECT product_name, product_id FROM products ORDER BY product_name;
Save and run the page.
Step 2: Enable Search in the Dropdown
APEX provides a Searchable option for dropdown lists:
Go to P1_PRODUCT.
Under Appearance, set Allow Search to Yes.
This allows users to search within the dropdown instead of scrolling through long lists.
Enhancing Auto-Fill Controls with Dynamic Actions
You can use Dynamic Actions to automatically populate other fields based on user selection.
Example: Auto-Fill a Price Field Based on Selected Product
If a user selects a product from the dropdown, its price should automatically appear in another text field.
Create the Price Field
Add a Text Field (P1_PRICE) to the page.
Add a Dynamic Action
Select P1_PRODUCT.
Click Create Dynamic Action → On Change event.
Add an action: Set Value.
Set Set Type to SQL Query.
Use this query to retrieve the price:
SELECT price FROM products WHERE product_id = :P1_PRODUCT;
Set Affected Elements to P1_PRICE.
Now, when a user selects a product, the price field fills automatically.
Best Use Cases for Auto-Fill Controls
Auto-Complete Text Fields: Best for name searches, locations, or any user-entered data that has multiple possibilities.
Dropdowns with Search: Useful for selecting predefined values when the list is too long for a standard dropdown.
Dynamic Actions for Auto-Fill: Ideal for auto-populating related data fields like price, department, or customer details.
Auto-fill controls improve user experience by reducing input errors and speeding up data entry. Text fields with auto-complete are great for searching large datasets, while dropdown lists with search help users quickly find predefined options. Adding AJAX and dynamic actions further enhances the functionality, ensuring smooth and efficient interactions.
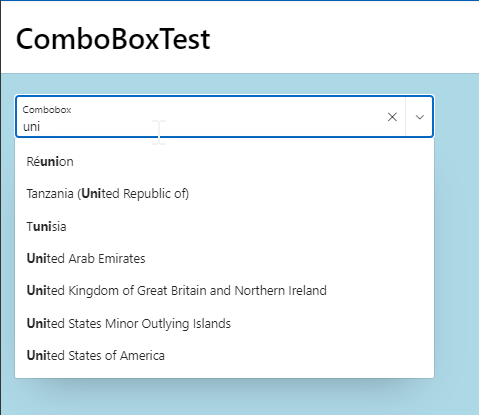
EXAMPLE:
This uses a Combo box and a textbox in combination
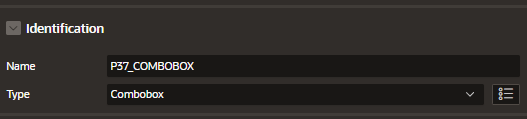
Step 1 – Add the Combo box
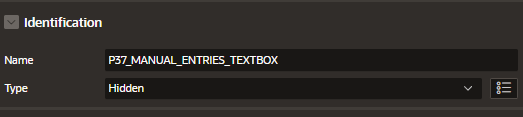
Step 2- Add the textbox
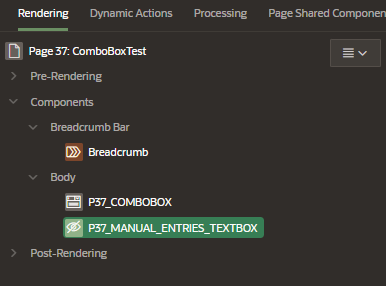
Step 3 – Hide the textbox
Step 4 – Do the following changes for the combo box

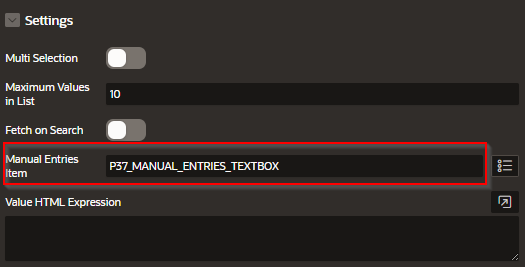
Result