Introduction
In Oracle APEX, creating an intuitive interface for managing data selections is essential for user productivity. One common pattern is the dual-panel layout, where users can move items from a left panel (available options) to a right panel (selected items). This technique is often used in forms where users need to assign roles, select categories, or choose multiple entries from a list. Oracle APEX supports this functionality using the Shuttle item type, allowing seamless transfer of data between panels without writing complex code.
To move data from a left panel to a right panel in Oracle APEX, you typically use the Shuttle page item, which provides dual‑list “pick list” functionality out of the box. Users can select one or more values on the left (Available) and click arrows to transfer them to the right (Selected), and vice versa.
1. Create the Shuttle Item
• In Page Designer, under the region where you want the panels, right‑click Items and choose Create → Shuttle.
• Give it a name, e.g. P1_MY_SHUTTLE.
• Set Display Extra Values to No (unless you need to show values not in the LOV).
2. Define the List of Values (LOV)
• Under the Shuttle’s properties, in the List of Values section, choose Type = SQL Query (or Static).
• For a SQL LOV, enter:
SELECT display_value, return_value
  FROM my_lookup_table
 ORDER BY display_value
• This LOV populates the left “Available” panel.
3. Configure Shuttle Attributes
• Display Null Value = No (removes an empty row).
• Height = e.g. 200 (pixels) to show enough rows.
• Icon Alignment = Left or Right for the arrow buttons.
• Appearance: choose Compact or Default.
4. Set Source for Selected Values
• Under Source → Type, set Always, replacing any existing value.
• This maps the selected items (right panel) to P1_MY_SHUTTLE on page submit.
5. Using the Shuttle in Processes
• When the page submits, :P1_MY_SHUTTLE contains a colon‑delimited list of return_values from the right panel.
• In a PL/SQL process, split and insert or delete as needed:
BEGIN
  FOR i IN apex_string.split(:P1_MY_SHUTTLE, ':') LOOP
    INSERT INTO target_table(col) VALUES(i);
  END LOOP;
END;
6. Manual Dual‑List Implementation (Optional)
If you prefer custom regions instead of a Shuttle item:
a) Create two Classic Report regions side by side with static IDs (leftPanel, rightPanel).
b) Add buttons or icons for “Move →” and “← Remove” with jQuery selectors.
c) Use Dynamic Actions:
• Event: Click on the Move button.
• True Action: Execute JavaScript:
$('#leftPanel option:selected').appendTo('#rightPanel');
• Similarly, for the Remove button:
$('#rightPanel option:selected').appendTo('#leftPanel');
• Finally, on submit, collect rightPanel values into a hidden item for processing.
By using the built‑in Shuttle item you get a fully supported dual‑list control with minimal effort. For custom requirements, the manual approach using Dynamic Actions and JavaScript gives you total flexibility over layout and behavior.
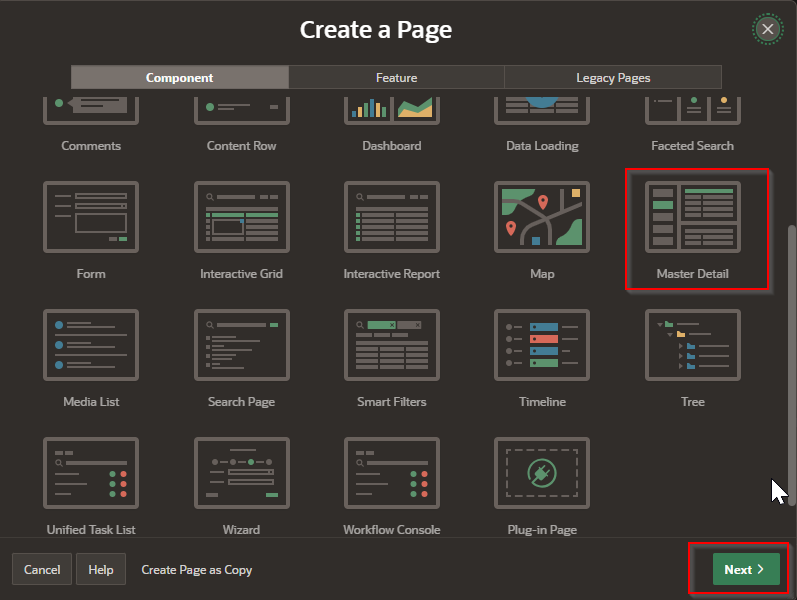
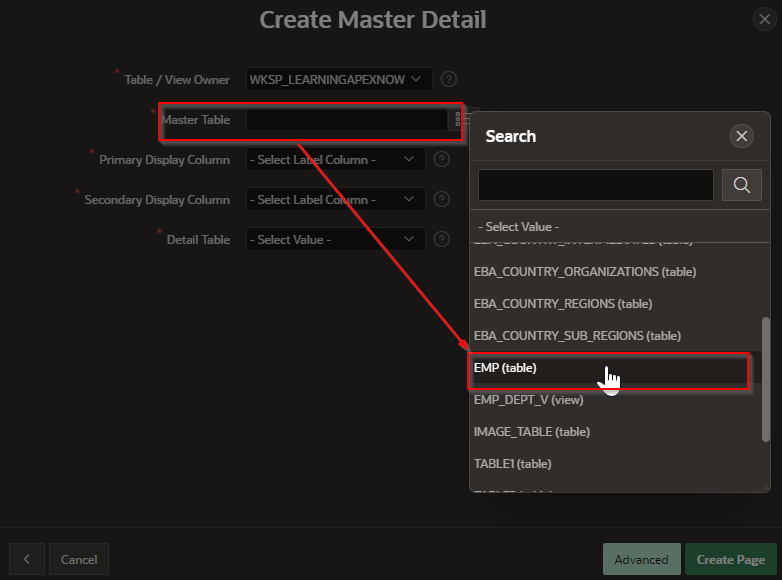
Select Master Detail
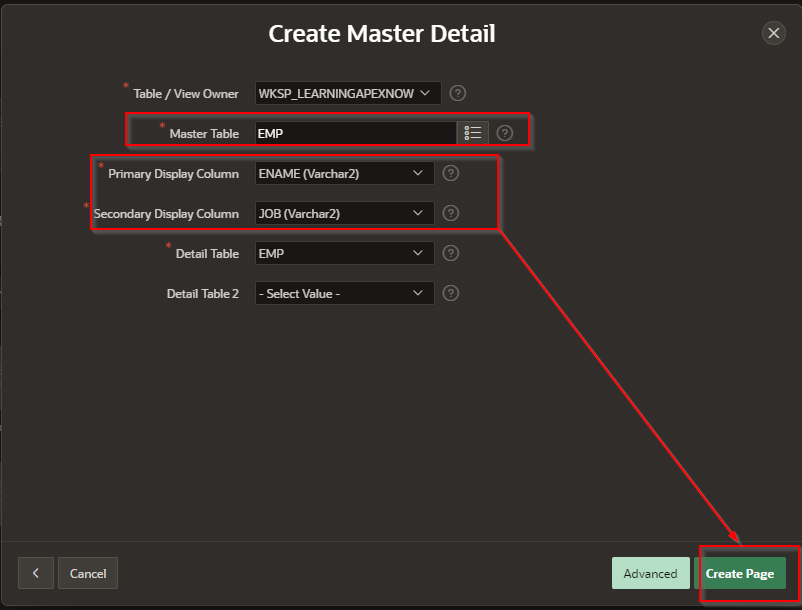
Select the table
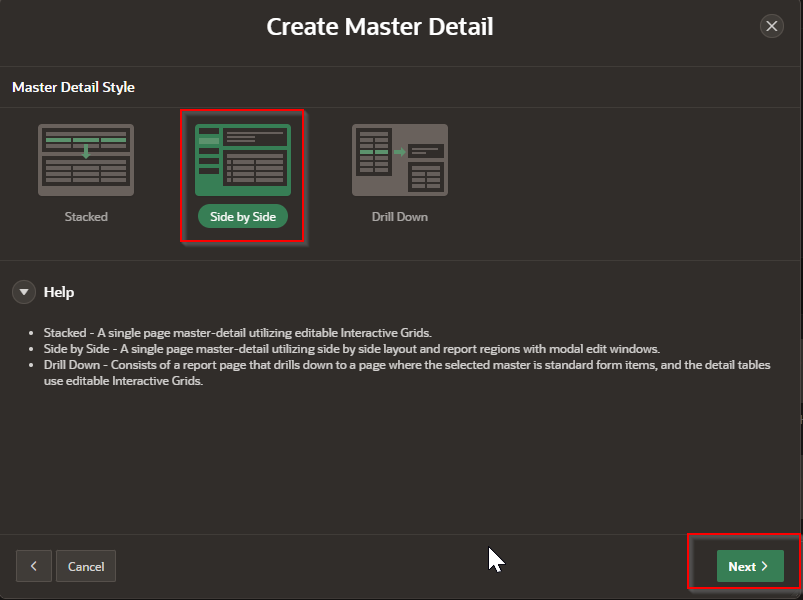
Select the kind of report
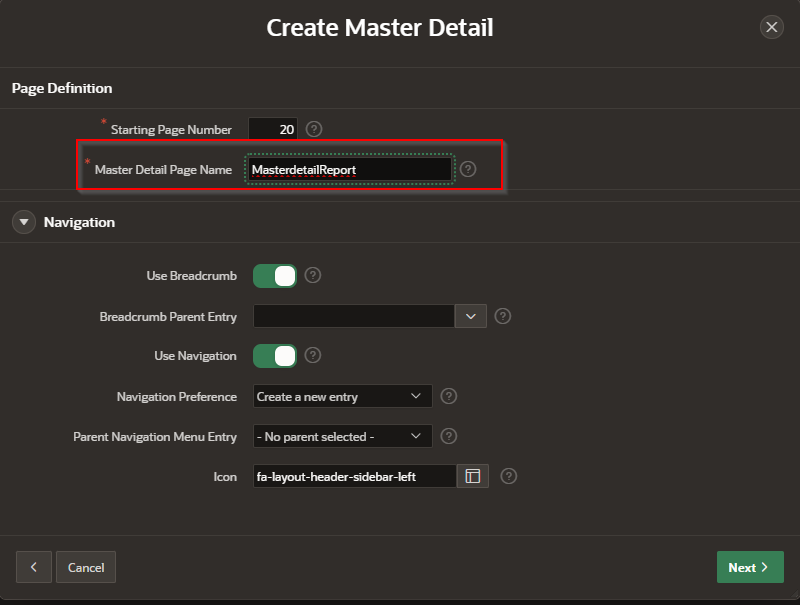
Name the page
Identify the table that you want to work with
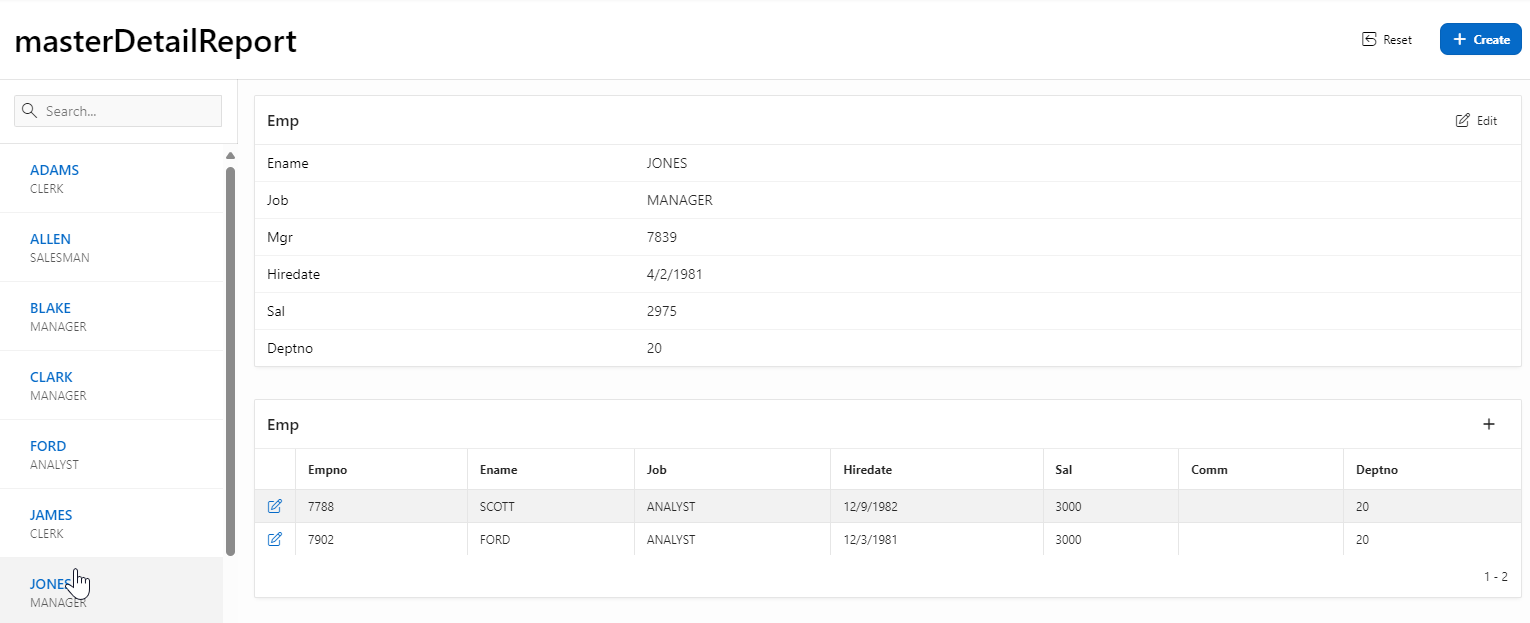
This is the result:
Using the Shuttle item type in Oracle APEX simplifies the process of selecting and transferring multiple values within a form. This component enhances user interaction by offering a clean, drag-free, and organized method for moving data between two lists. Whether you're managing user permissions, filtering datasets, or setting preferences, this approach helps keep your UI efficient and user-friendly while reducing the need for custom development.


No comments:
Post a Comment